With the weather warming up and outdoor plants starting to come back to life, spring is the perfect time of year to add some greenery inside your home. If you’ve ever been worried about finding a home for small plants, this tutorial from Tahni at Urban Cottage Living is perfect for you! See how you can add a rustic plant holder in your home and don’t forget to enter to win a prize from one of our amazing party sponsors at the end of the post.

Hi, I’m Tahni from Urban Cottage Living where I’m living a big life in a small home. In 2015, I downsized my life and now call an old 920 square foot cottage home.
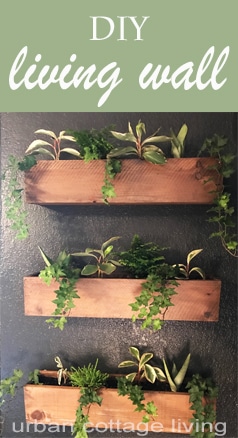
I’m excited to share with you my DIY living wall. Recently, I updated my little bedroom and adding a living wall was the perfect way to include lots of plants and a piece of art at the same time. Plants give off lots of oxygen for good sleep and they are pretty and peaceful.
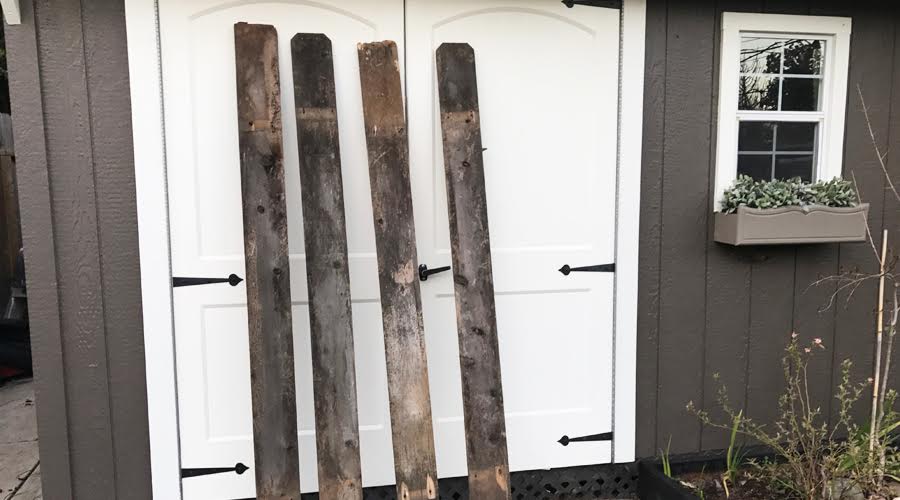
I made my living wall out of reclaimed fence boards, but you can make yours out of reclaimed barn wood, pallet wood, or even new boards if you want.
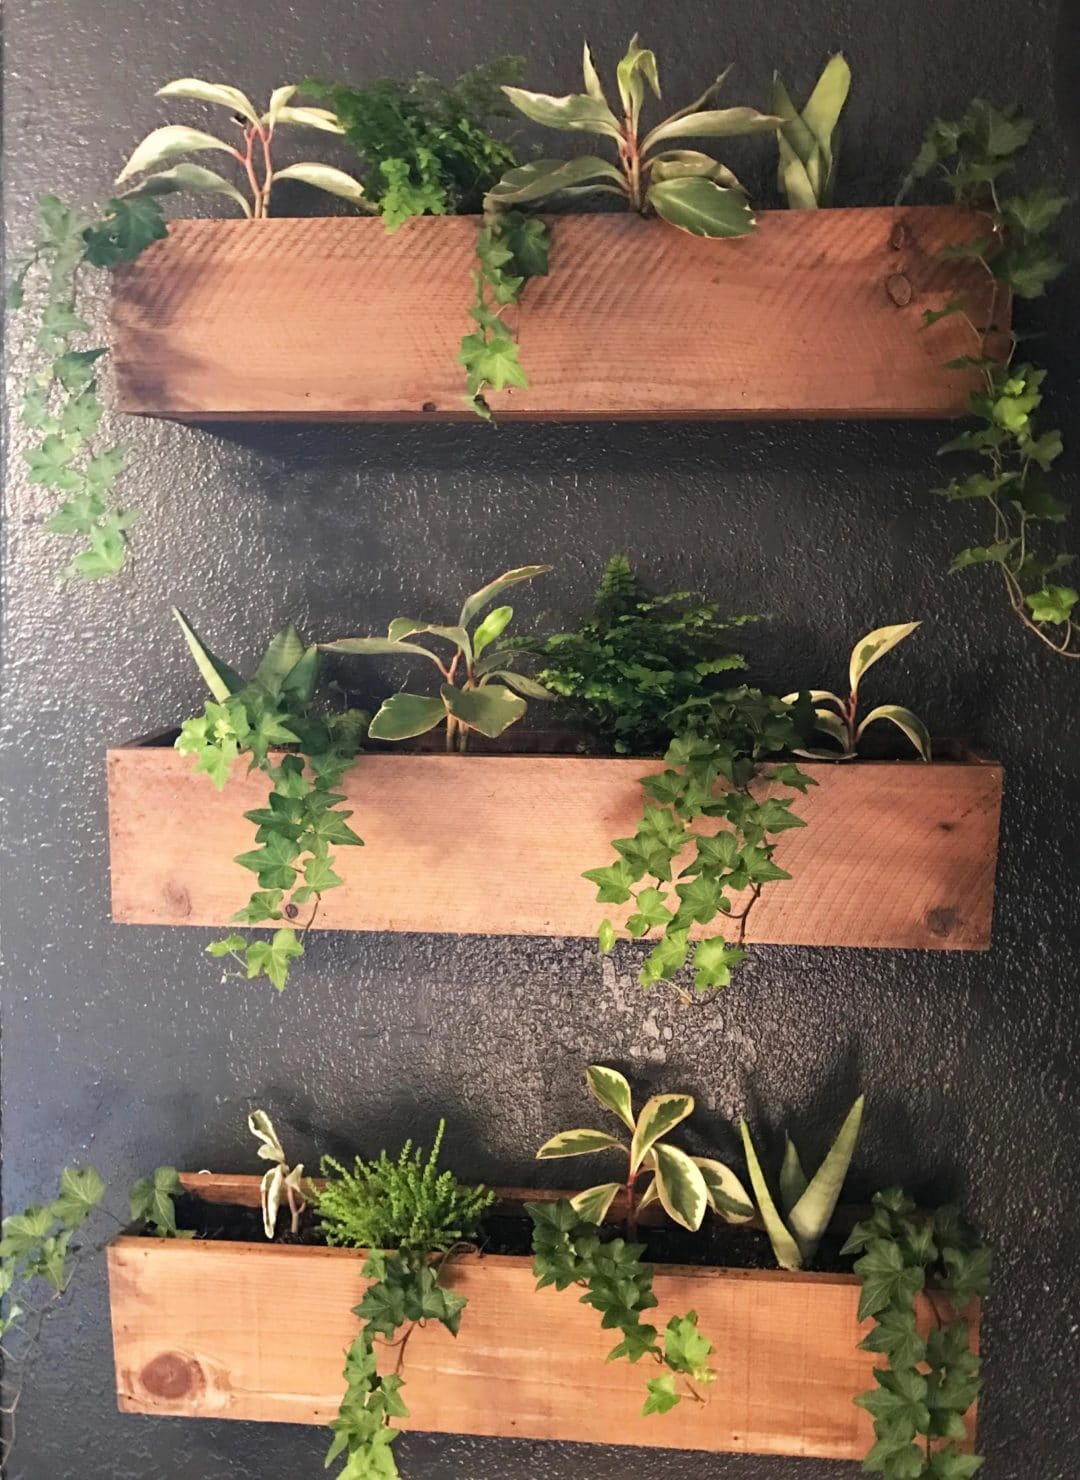
The following step-by-step instructions include supplies to build three 26 x 4.5 x 5.75 boxes. You can adapt the measurements and the number of boxes for your living wall design.
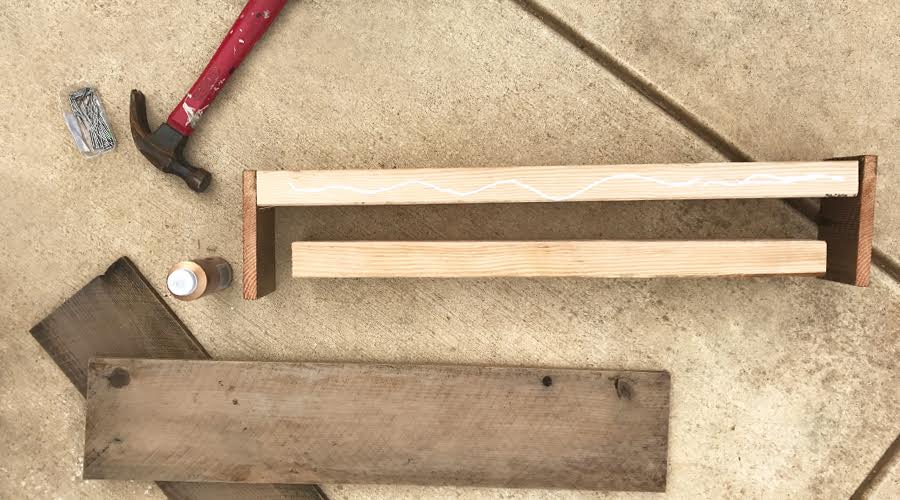
Supplies
- 4 fence boards – mine were 5.75 inches wide and 6 feet long
- 2 2×4 boards – mine were 6 feet long
- A bottle of wood glue
- 1 1/2 inch finishing nails
- Picture hangers
- Molly screws
- Phillips bit screwdriver
- Pencil
- Water-based Polycrylic in matte
- Paintbrush
- Pond liner or heavy-duty trash bags
- Potting soil
- Plants
Tools
- Scrub brush
- Dishsoap
- Measuring Tape
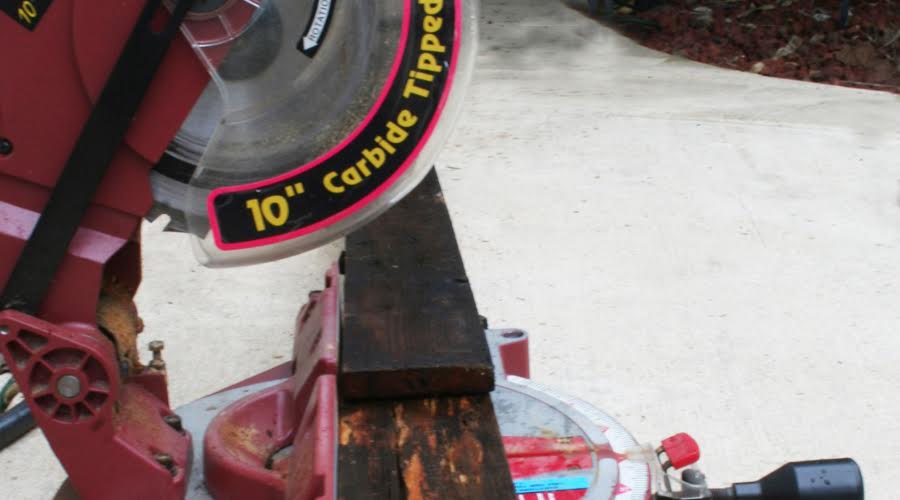
- Saw – I used a chop saw
- Hammer
- Stapler
Cut
- Fence boards – cut six pieces 26 inches long and six pieces at 3.5 inches long.
- 2×4 studs – cut six pieces at 25 inches long. Note, you will want to adjust the length of your 2×4 boards if your fence boards are a different thickness than .5 inch.
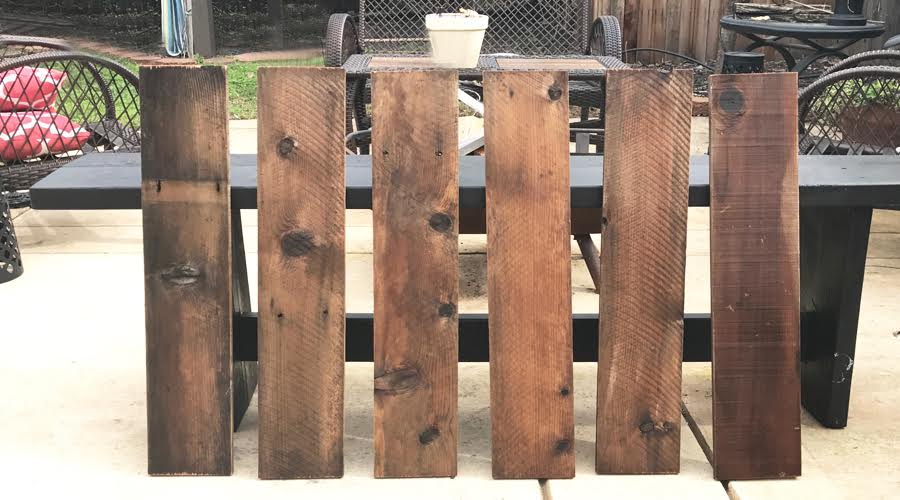
Wash
If you are using salvaged boards like I did, make sure you wash them really well. I scrubbed mine with a firm brush using dish soap and water. Allow them to completely dry.

Dry
Let your boards completely dry after washing.
Assemble
On a flat surface, lay out your 2×4 stud with your end pieces. The 2×4 is going to be the bottom of your box.
Run a zigzag line of glue along the 2×4.
Tip: Using a 2×4 as the bottom of your box instead of another fence board, is because it is thicker. This will help hold your box together better.
Place one of the 26-inch boards on the glue, lining up the bottom and then ends flush.
Nail with six finishing nails to secure.
Flip over and repeat keeping the end pieces in place to keep the box square and level.
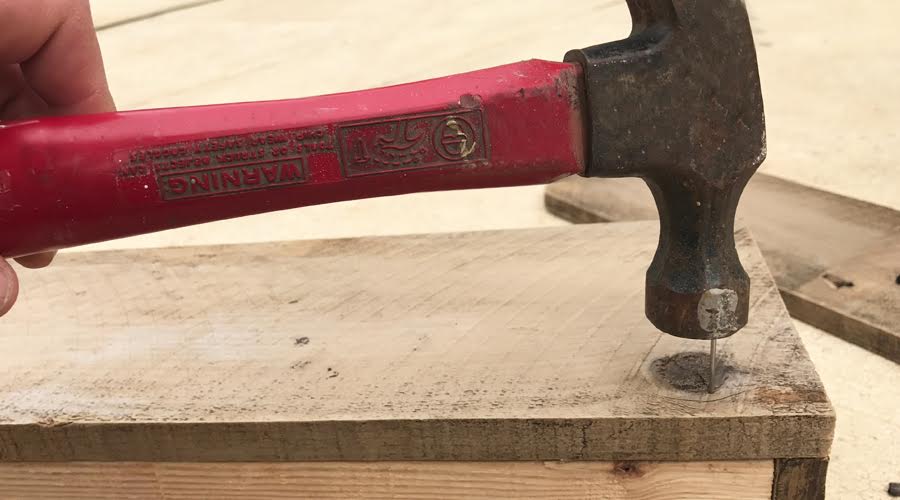
Glue nail your end pieces.
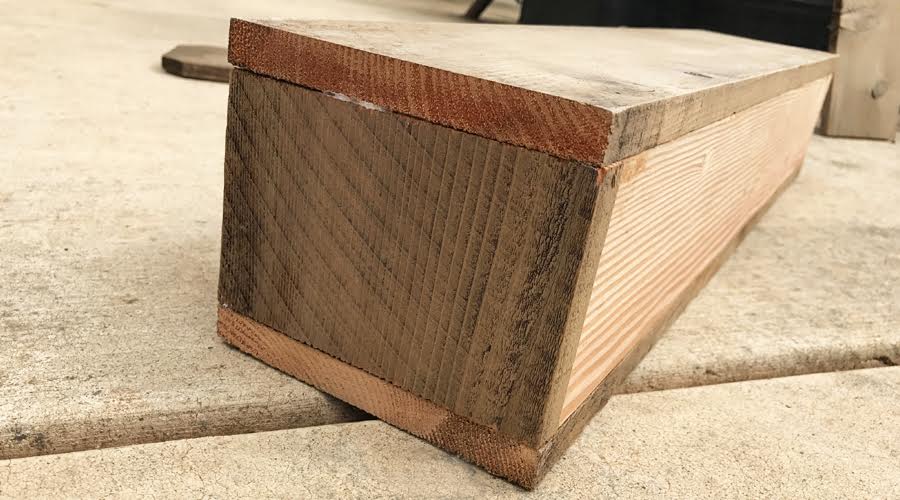
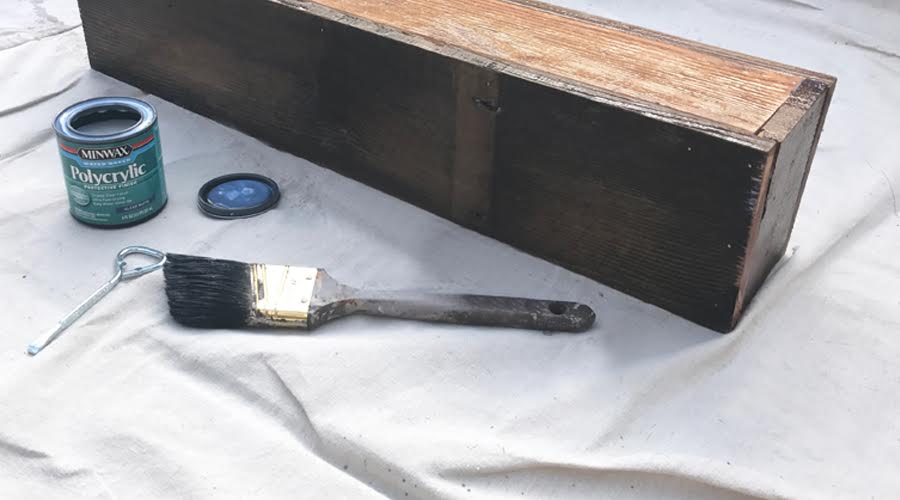
Seal
Allow the glue to dry completely.
Brush a coat of Polycrylic on your boxes.
Allow to completely dry and repeat.
Allow to completely dry.
Tip: Sealing your boxes will bring out the grain and character in the wood. This will give a similar look to as if the boards were wet.
Add Hooks
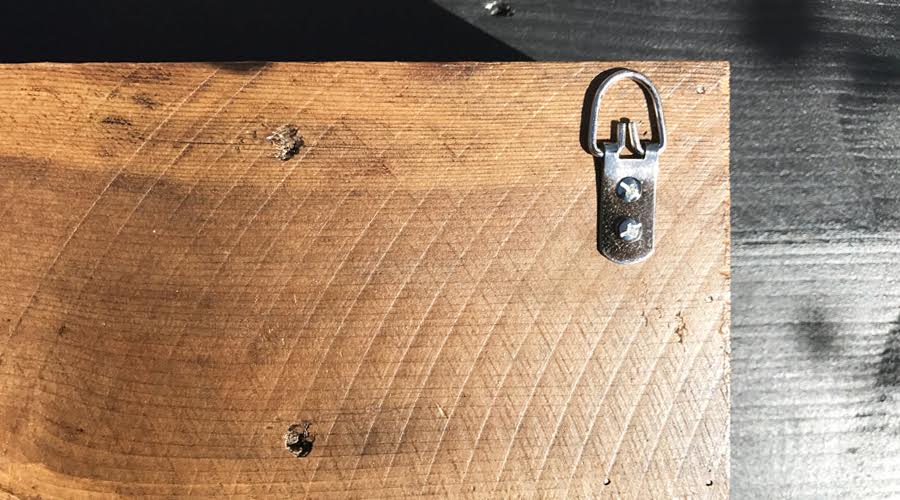
Decide what side of the box you want to be the front.
Set the box front side down on a flat, solid surface.
Measure one inch from the outside of the box lining the hook to be right at the top.
Mark the holes with a pencil.
Using the screws that come with the picture hangers, attach to the back of the box.
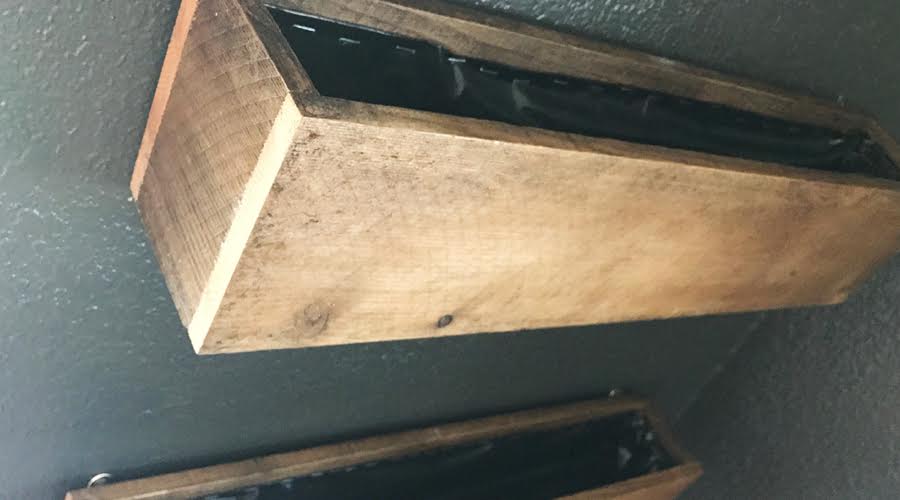
Attach Liner & Hang
Staple pond liner or heavy duty trash bags to the inside of your boxes one inch below the top.
Measure where you want your boxes to hang, mark where the wall screws need to go.
Install your wall screws using molly screws if necessary.
Tip: Fold the pond liner under one-inch to give a clean look. If you are hanging directly on sheetrock, you will want to use molly screws to hold the weight of box once filled with dirt and plants.
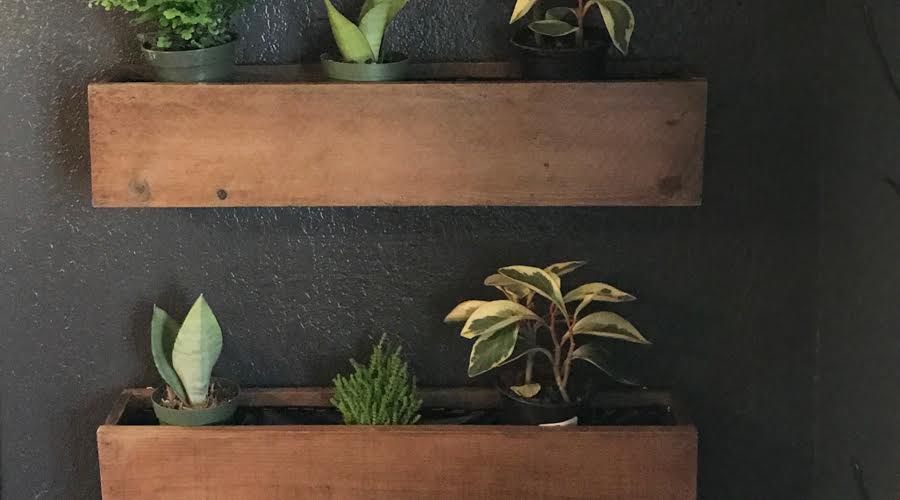
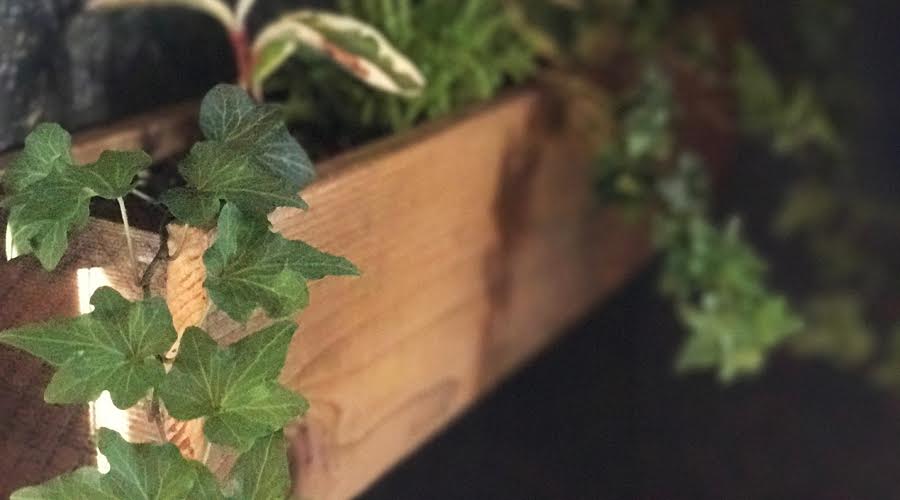
Add Plants
Play around with the layout of your plants before you plant them.
Fill the boxes with potting soil and plants
Water the plants
Tip: You may want to unhook the boxes from the wall and take them outside or to the garden shed for planting the plants.
You can find more DIY projects, organization, and design for living a big life in a small home at my website, Urban Cottage Living.
Disclaimer: Contest prizes are provided by sponsors. All writing and opinions belong to myself or the post contributors.
No Comments