Today I’ll show you the remaining two flower types to wrap up your felt flower wreath. I love how bright and vibrant this wreath looks on my front door and I can’t wait to see what colors you choose for your project.
If you are just joining us now, you may want to hop back a couple of posts to see how to make Rosettes and Carnations as well. Today’s tutorial will cover roses and mums before showing you how to put all the pieces together into a finished Felt Flower Wreath for the perfect addition to your summer decor.
Felt Roses
Begin your rose by cutting a piece of felt that is 10 inches long, straight on one side and wavy on the other.

Select one side of the felt and begin to roll. Every half wrap add a dab of hot glue to hold everything together. Set aside until the glue has properly cooled.
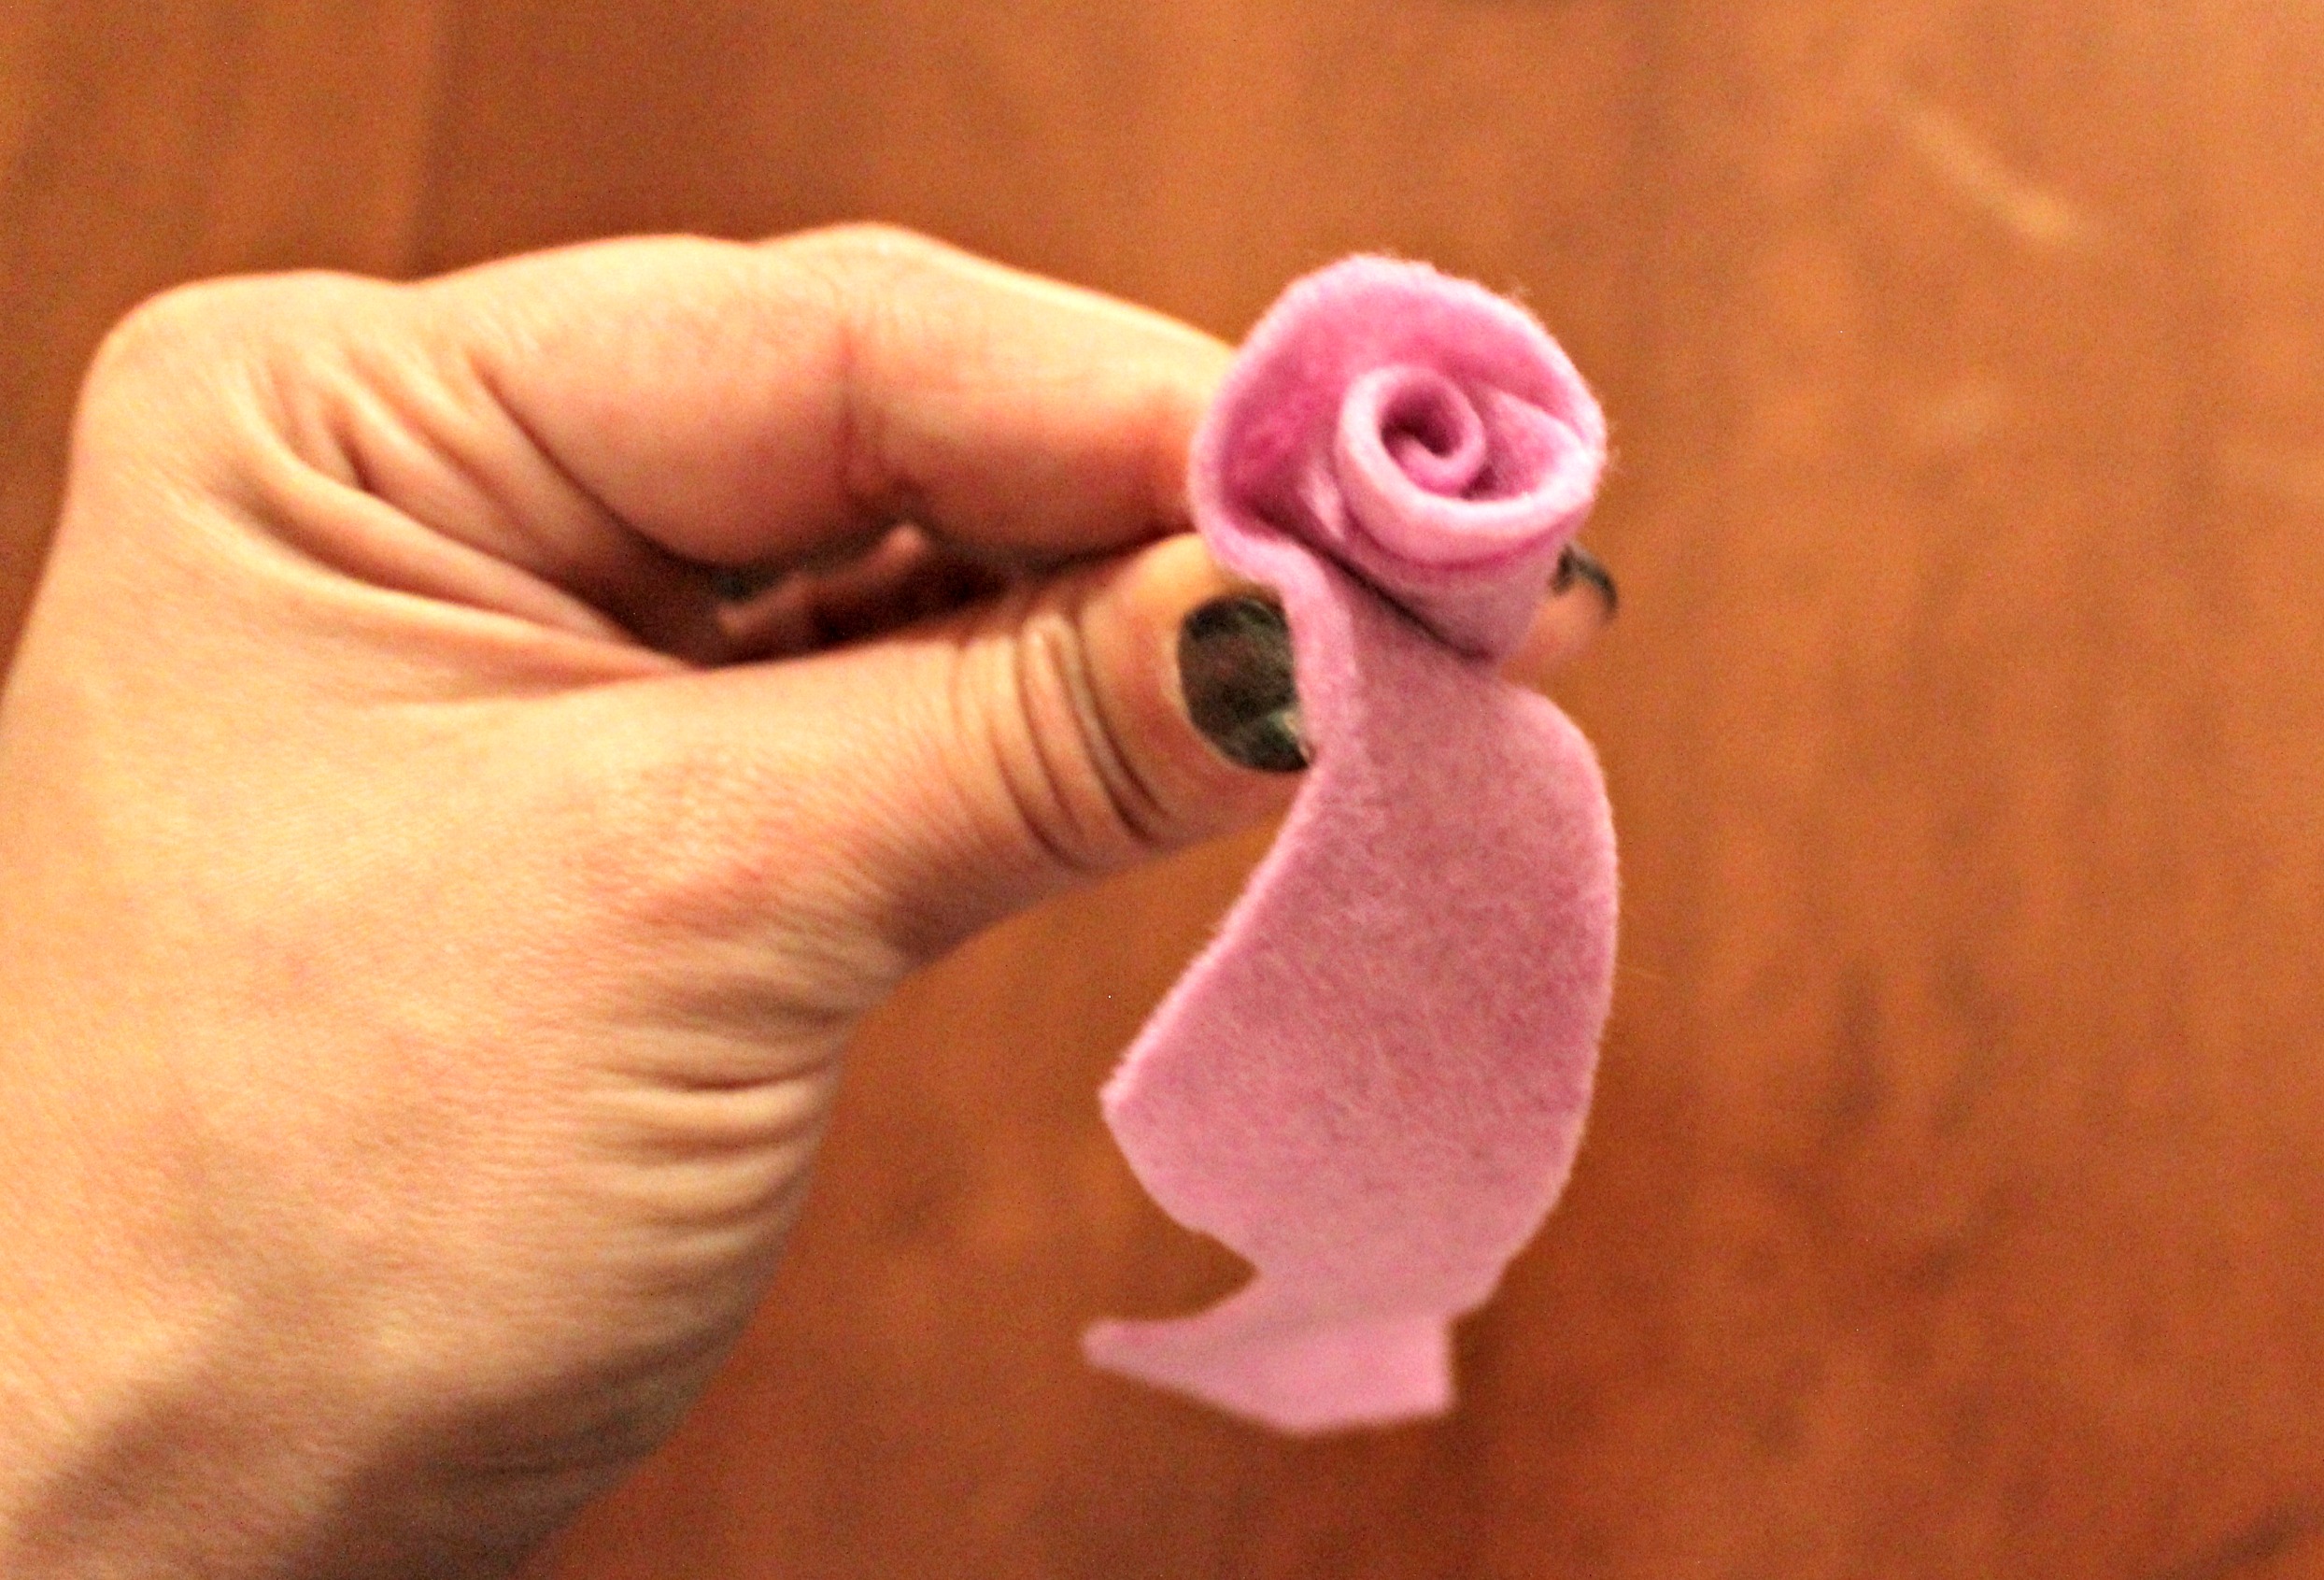
Once the glue is cooled you can separate the leaves and fold them open into the shape of rose you wish you use for your project. If you want a bigger rose, you can add a second piece of felt and continue shaping.
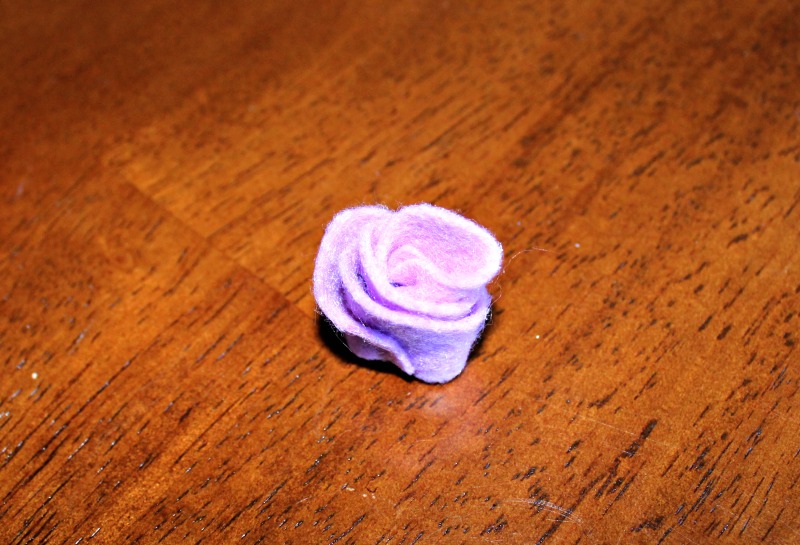
For my wreath I needed quite a few of these small roses to fill in the gaps between the bigger flowers.
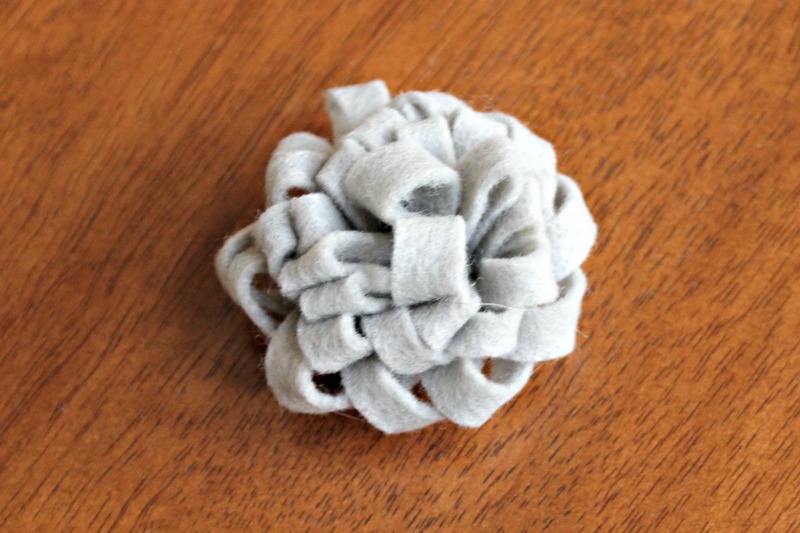
Felt Mums
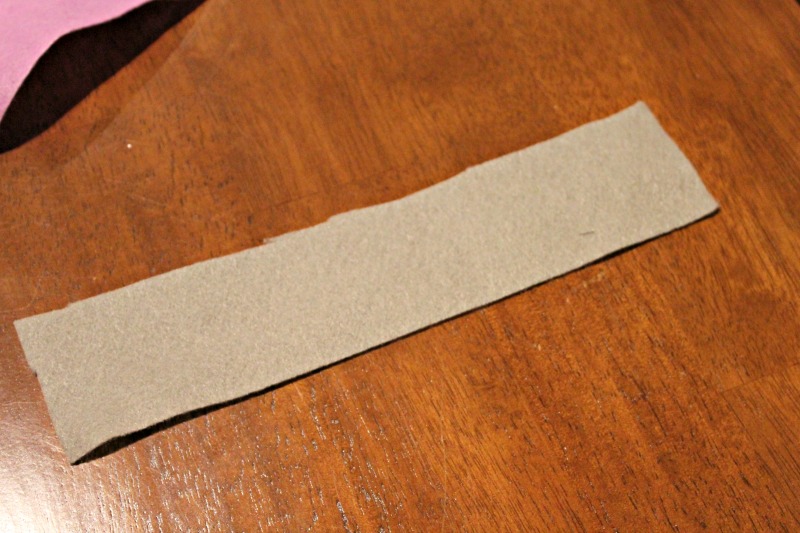
To create a felt mum, you need to start with a piece of felt that is 2 inches x 10 inches wide. This is your mum base.
Fold the felt in half and using a pair of scissors cut 3/4 of the way through the felt. Be careful to not cut all the way through.
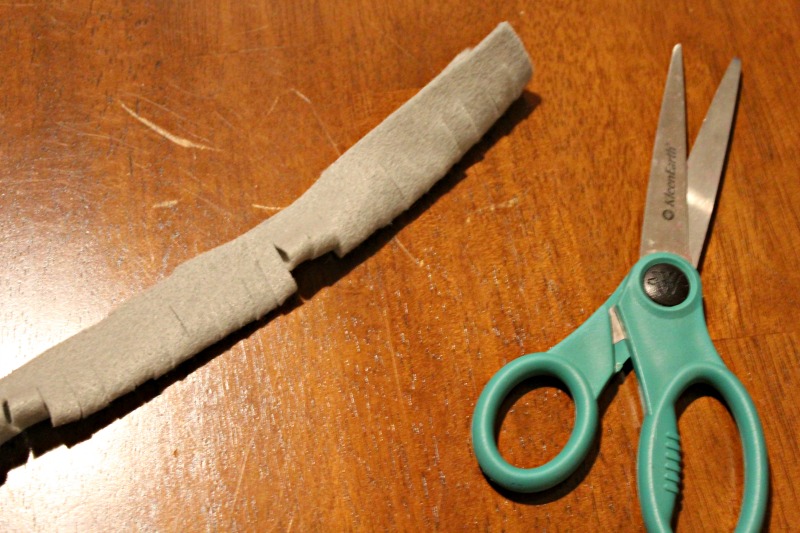
Begin on one side of the felt and start to roll. Because the slivers are a bit more loose then other flowers you may need to add glue every 1/4″.
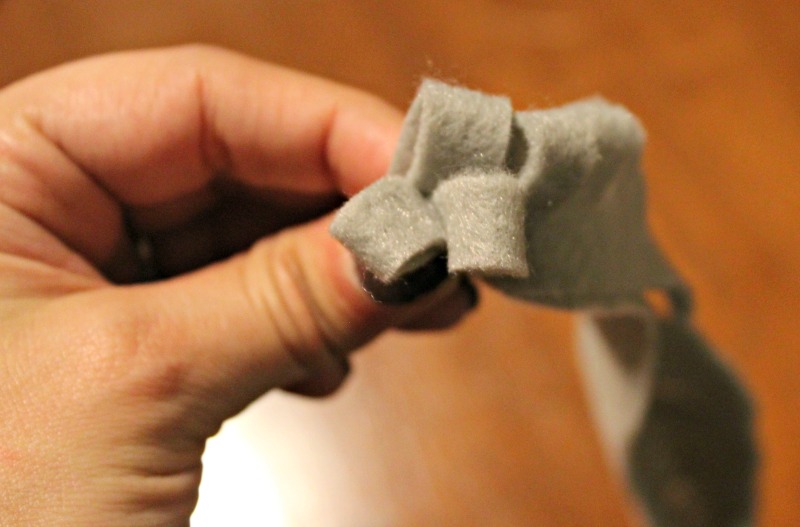
Continue wrapping felt and adding glue as you go. Once your felt is 100% wrapped around itself, set aside for the glue to dry and set.
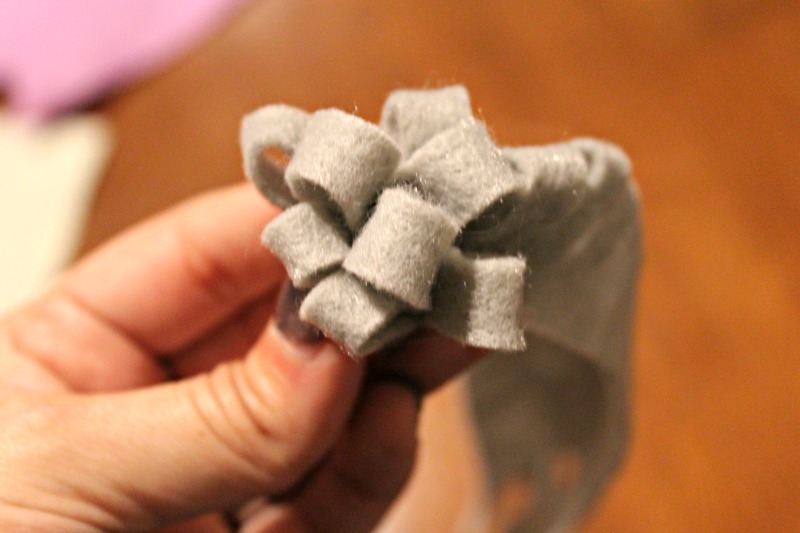
Your finished felt mum will not need much shaping. The felt cuts naturally falls apart like a flower should.
Felt Flower Wreath
Now that you have all the component parts of your wreath complete it is time to assemble the final project.
Begin by laying out your flowers on the wreath body (I picked up this wreath body for $5 at Joanns). See what configuration works best and decide where you want the felt flowers to appear. Once you know where everything belongs, use a hot glue gun to put it all together and leave the felt flower wreath to dry overnight.

Once the glue has set you can hang on your door for the neighborhood to enjoy!


1 Comment
Finding Bliss: Upgrade Your Porch Appeal – Denver Style Magazine
July 22, 2016 at 2:02 pm[…] throw pillows will show off your personality and bring light and warmth into your porch decor. The felt flower wreath above can be whipped together in just a couple of hours using sheets of felt, hot glue and a wicker […]