Today’s project is brought to you by the incredibly inspirational and creative Beth from The Ruffled Daisy! Beth’s blog is a showcase of delicious recipes and fun projects that will inspire you to make DIY a part of your home decor. Check our Beth’s project below and head to the contest details at the bottom of this post to enter to win one of three crafty prizes!
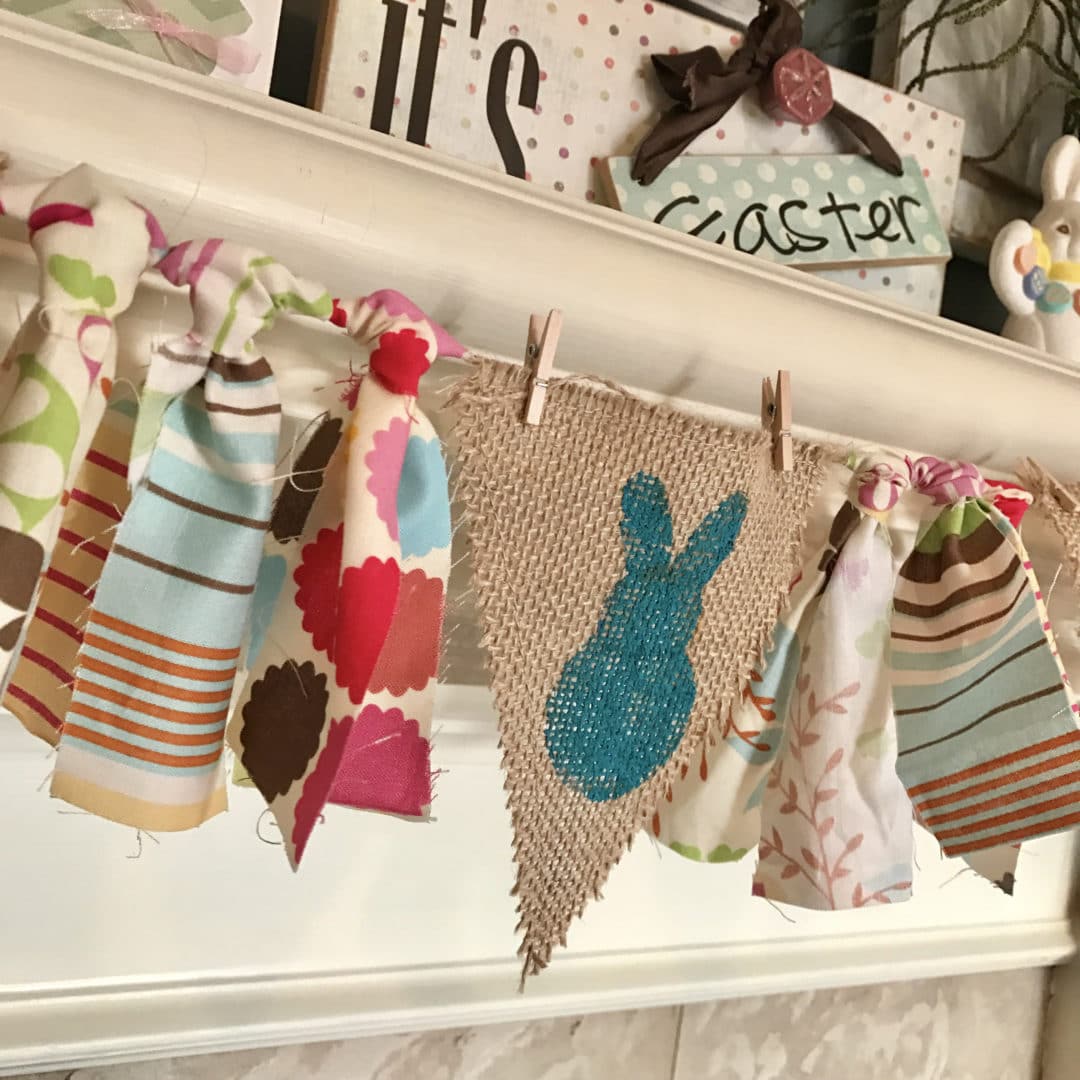
Easter Bunny Burlap Banner
Hi Rocky Mountain Bliss Readers! I am so excited to be here today to share with you a little about who I am and what I’m about. I’m Beth with The Ruffled Daisy. If you’re a woman who wants it all and is done with settling for less, then you’re in the right spot! After your “visit” with me, I hope that you leave supported, empowered, inspired, and connected. My mission is to empower all women to create beauty in their lives. There are so many areas that you have the power to create beauty amidst all the chaos, you just have to slow down and see where your beauty lies and it’s my aim to help you do just that.
“I believe in a world fueled by creativity and passion!”
“I believe in self-expression, self-love and self-responsibility. I know FOR SURE that life is what you make it!”
I’ve been blessed to be able to share my passion for all things decorating and entertaining with people like you! People who like to DIY for themselves but need a little guidance along the way.
Today I want to share with you how to make this adorable Easter Bunny Burlap Banner. It’s the perfect addition to any mantle, hutch or entryway.
For this project you’re going to need the following supplies: burlap triangles, fabric, twine, paint, bunny stencil, craft clothes pins.
Using the stencil, paint the bunnies into the burlap. Because burlap isn’t a tight weave fabric you will want to do this on a piece of paper because the paint will seep through. You can do all of the bunnies one color or mix it up to match the fabric ties. Set aside to dry.

Taking your fabric, make a small slit 2″ from the edge and “rip” your fabric into long pieces once you have them all torn, you can trim them each to about 12″ long. Tying the strips onto the twine works best if the twine is attached to something. I went ahead and hung it on my mantle and assembled it there. You’ll want to double your strips of fabric and tie them like I’ve shown below.
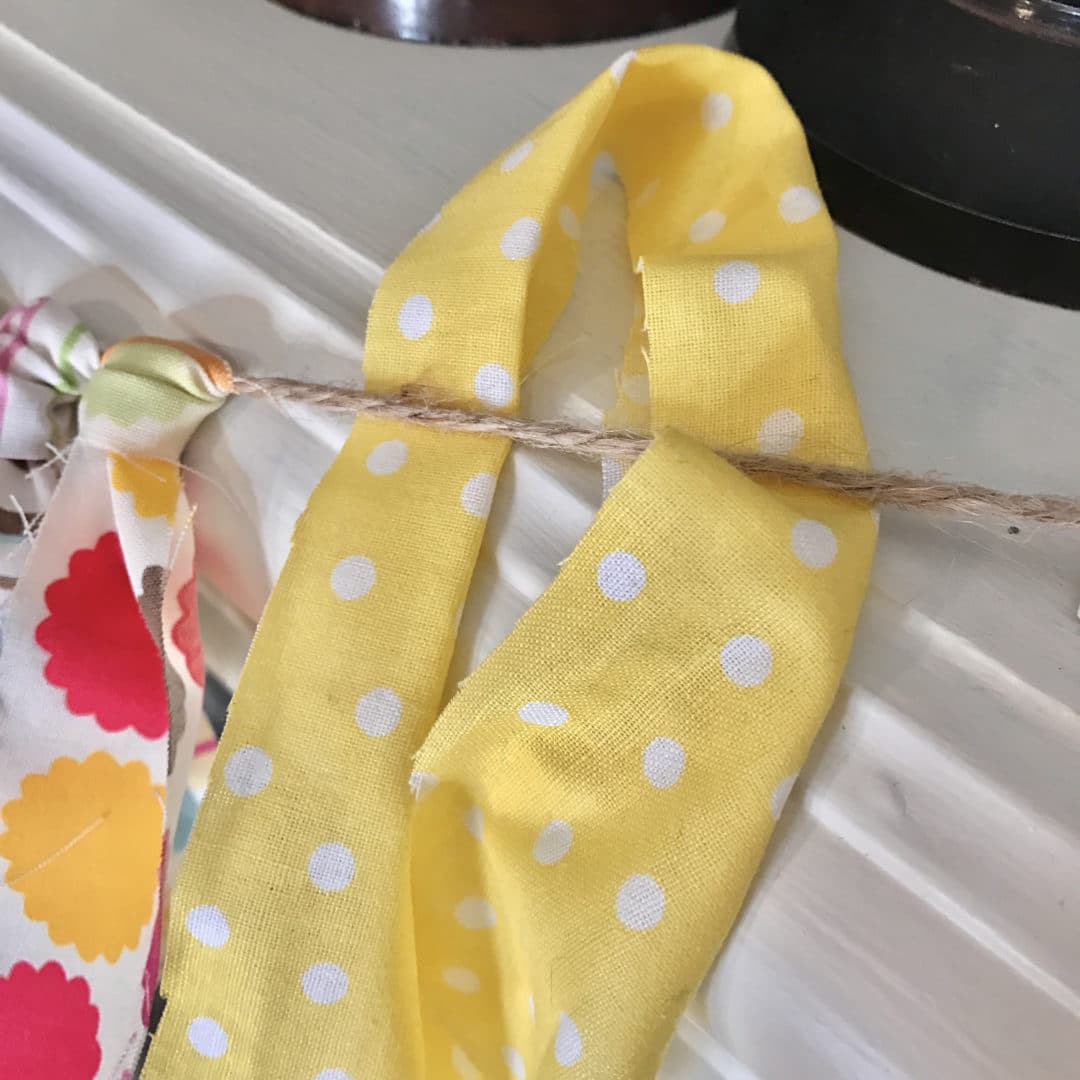
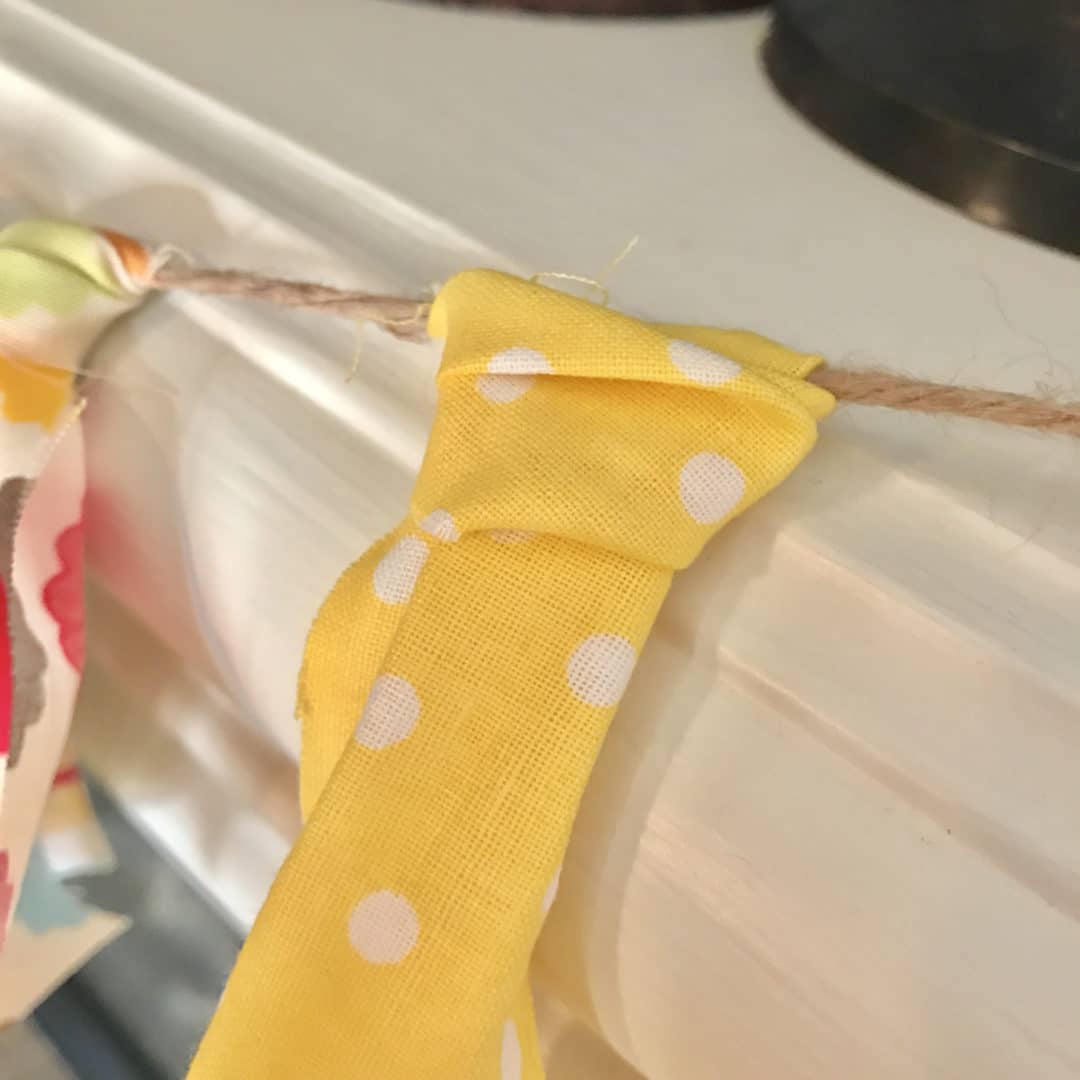
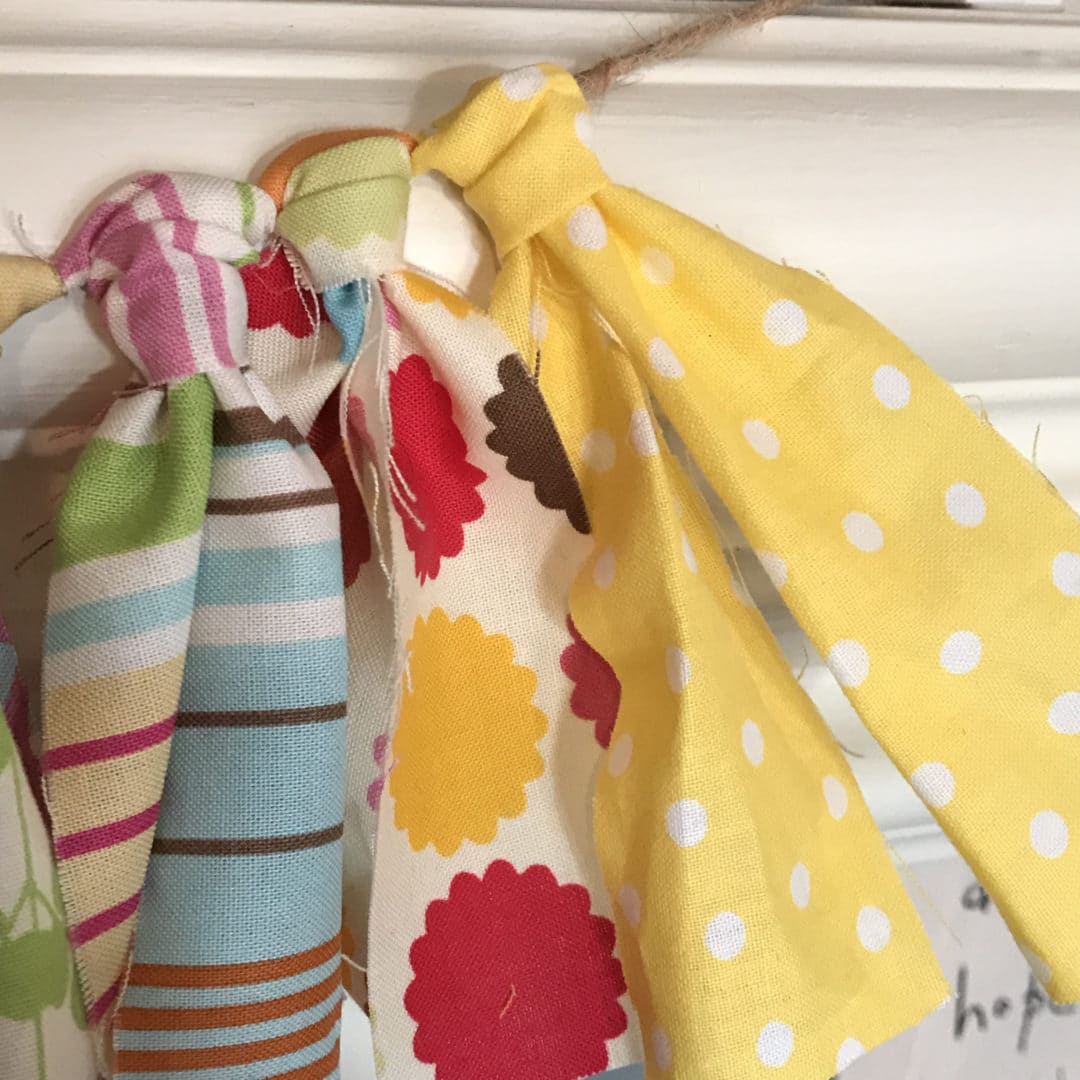
Tie is all of your fabric strips onto the twine to your liking. I spaced them to where I had three between each burlap bunny flag and then four in each end. Depending on your space or where you’re displaying this piece, you can add more fabric strips to fill it in.
I attached all of the burlap bunny flags with small craft clothes pins. You could glue them depending on your preference but I like the look at the pins. Plus, it makes it easy to change out the flags for other holidays if your fabric strips will coordinate with other seasons, I can use this one through Spring and Summer.
What are you doing to decorate for Easter? I love pieces that can be changed with the seasons. It takes the stress out of decorating for me a little.
If you liked this DIY, I’d love for you to come visit me over at The Ruffled Daisy! Come and be inspired to live authentically, creatively and passionately in your home, personal life, and relationships!
Disclaimer: Prizes have been provided by the party sponsors. All writing and opinions belong to myself or this month’s blog party participants.

2 Comments
Natalie Mayhew
April 4, 2017 at 11:05 amSo adorable and I love the colors you chose!
Tahni
April 17, 2017 at 10:01 amSuch big impact for how easy this project is. You have inspired me to do a bigger version for my patio this summer!