
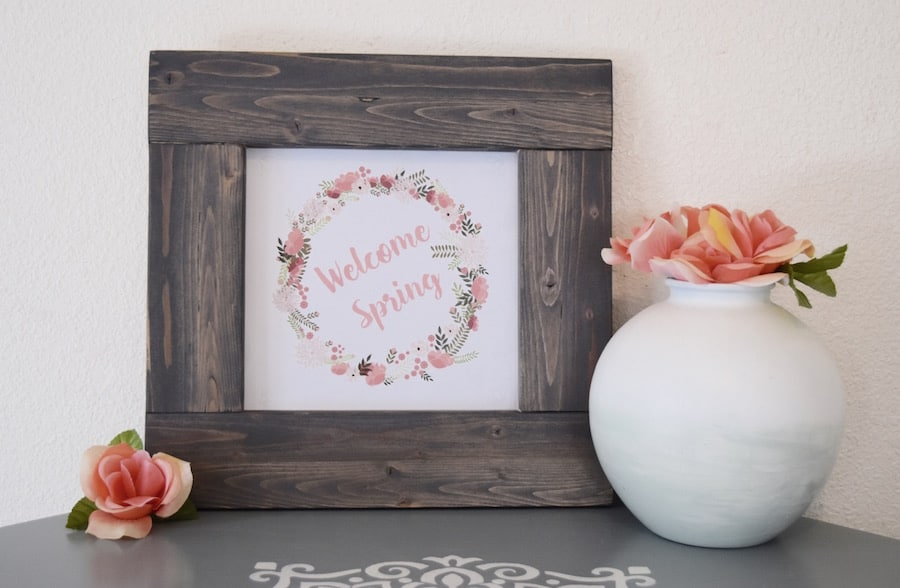
I love the rustic homey look of barnwood but its not always easy to come by and paying top dollar for a designer frame that looks distressed is kinda like buying $100 jeans with holes in them. That is why I LOVE this fun frame tutorial from Sara at Find It, Fix It or Build It. Sara has captured all the fun things I love about barn wood and made it into a project I can make on my own for just a few bucks!

Hi, I’m Sara from Find It, Fix It or Build It! Right now I live in Anchorage, Alaska, where the snow still hasn’t completely melted yet, but since this is a spring bash I’m going to imagine that it actually feels like spring!
I’m so excited to be here on Rocky Mountain Bliss to share my project with you. I believe many things in life don’t have to be as expensive as most people think, especially when it comes to furniture, decor and home improvement, and I love sharing DIY projects that help teach skills and save you money.
Printable or artwork
1 – 1×3 board
Minwax Wood Conditioner
Minwax Classic Gray stain
Kreg Jig OR Metal Plates
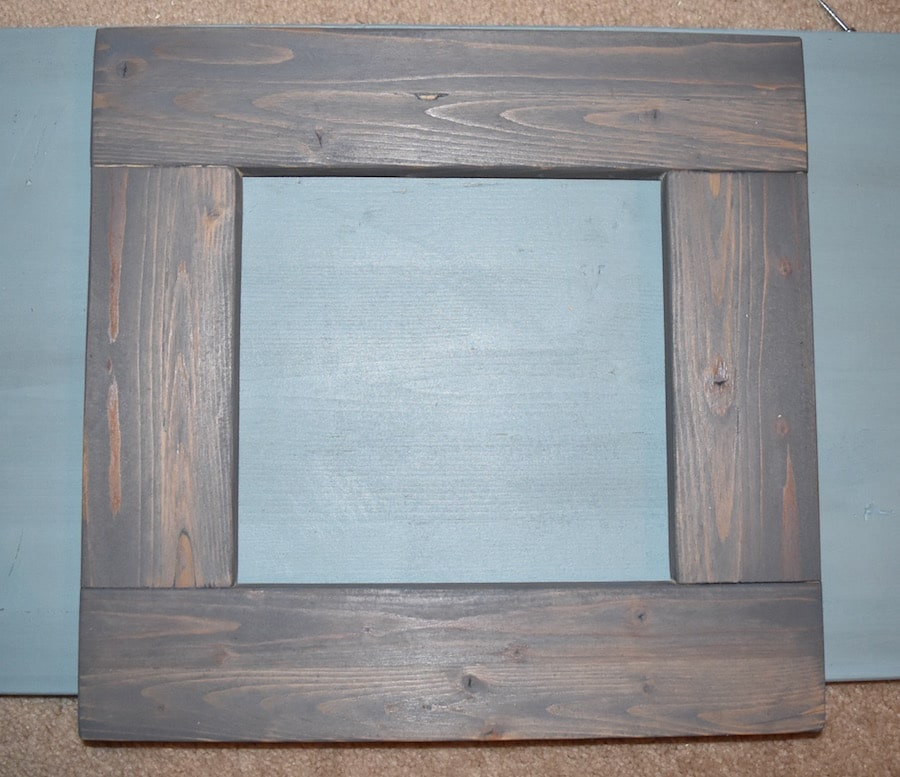
Step 1: Cut and Sand
Make the cuts for the top and bottom pieces of the frame first. Make sure to measure for extra length on either side of the paper to allow for the width of the sides of the frame (see picture).
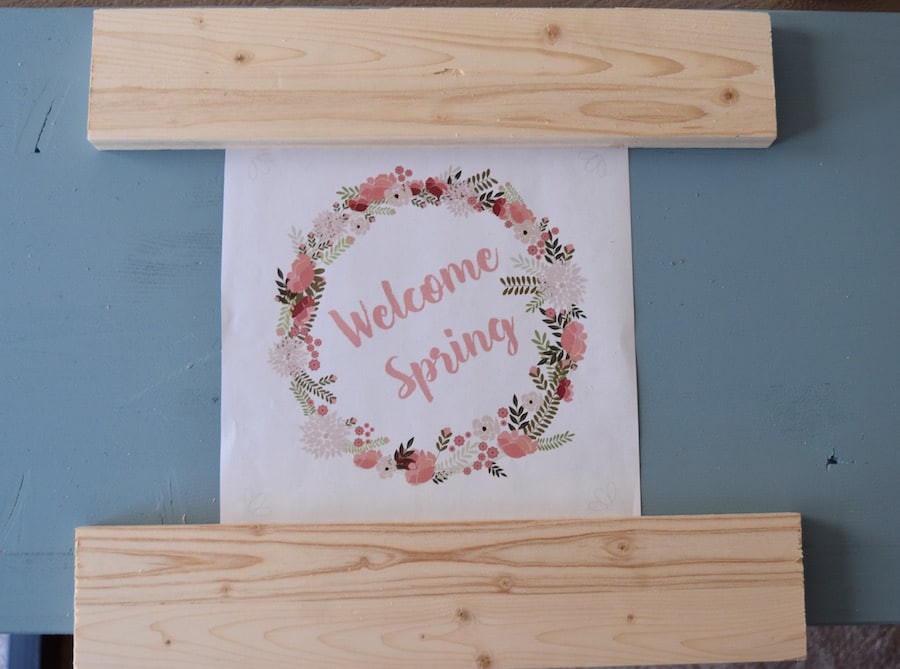
Lay the top and bottom on your printable or artwork and measure the distance between them to know how long to cut the sides. Cut 2 equal pieces for the sides. Sand all 4 pieces of wood. Make sure not to round any edges yet.
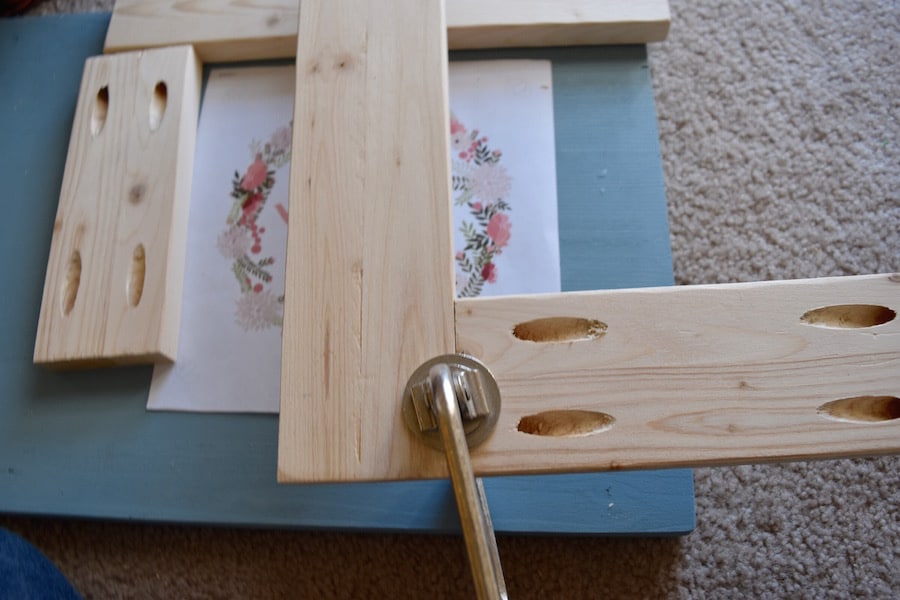
Step 2: Attach Pieces
If you have a Kreg Jig, drill 2 pocket holes on both ends of each of the side pieces. Clamp one side to the bottom piece and drill together. Repeat for the other side. Next, clamp and screw top piece on.
If you don’t have a Kreg Jig, you can buy small, thin metal plates with 4 pre-drilled holes from the hardware store and use these to attach all 4 pieces.
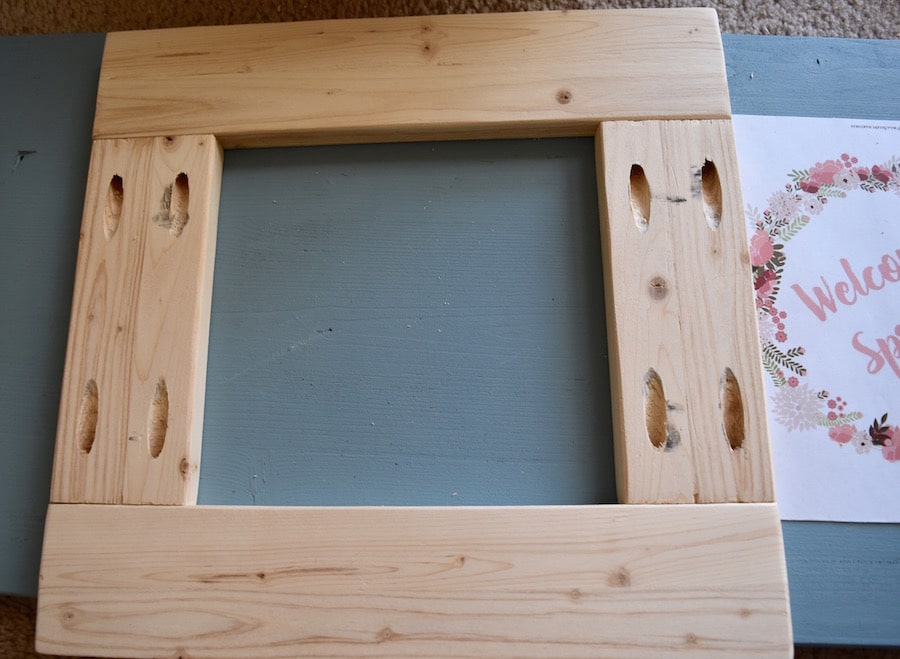
Sand the entire frame again. Now you can round any edges and corners you’d like rounded. Concentrate on sanding where one piece of wood meets another to create a smooth transition.
Step 3: Stain or Paint
If you are more comfortable with paint, you can paint and distress with sandpaper to get a rustic look.
If you decide to stain, you need to start by rubbing a wood conditioner on the entire frame so your stain doesn’t turn out blotchy. Apply 3 coats of stain, allowing sufficient dry time between each coat.
Now you can just tape your printable to the back of the frame to make it easy to change it with each season. If you’re using a piece of art and making it a permanent piece of decor, you can find some thin clips to screw into the back and hold the art in place at your local hardware store.
To download the “Welcome Spring” printable pictured you can visit Find It, Fix It or Build It where you’ll find 10 free spring and Easter printables! If you sign up for the monthly letter you’ll receive 11 free farmhouse printables sent straight to your inbox. While you’re there, make sure to take a quick look at pictures of all my furniture, decor and home improvement project ideas on the Find It, Fix It or Build It DIY Project Page.
Thanks for visiting the Spring Bliss Bash!