
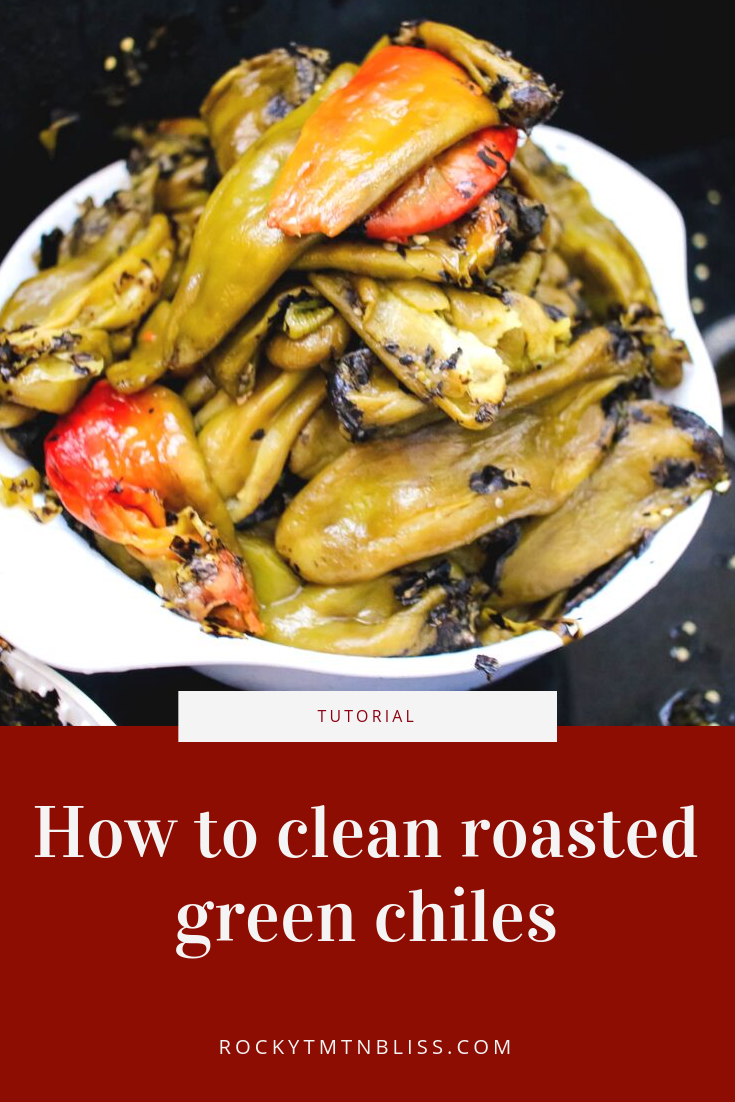
It’s chile season in Denver and that means road side stands have popped up all over town offering bushels of fresh roasted chiles for a steal. Green chili is a Colorado winter staple and the true ‘Coloradoan’ way to make it is with fresh chiles that you cleaned and froze earlier in the year. In a pinch you can use canned but in my opinion it’s just not the same.
As a Colorado Native buying and cleaning roasted chiles is a fall tradition I love! Moving outside the state it never felt like fall because other areas of the country just don’t have the crops to support the big scale roasting stands we have here. They do sell fresh roasted chiles at Central Market in Texas, but I’m not sure where else you can get them. If you are somewhere else in the US, please comment if you know where to find Chilies in your area!
Shopping at a road side stand means the best deal will be on a full bushel. Sometimes you can buy less, but it’s not as good a value. If you have the space just go for an entire bushel and hand off whatever doesn’t fit in your freezer to neighbors and friends. The stand we went is located off 92nd and Federal (in Federal Heights) and bushels were $40 buy one get one free.
You start off by picking the level of hotness you want in your chile. Since these are fresh less is usually more, unless you really do love extra spicy. We went with one bushel of medium and one bushel of hot. Usually I would actually get a mild chile but at the time there were not any available.
The roaster tosses all your chilies into a propane powered roaster and spins the chilies until they have a nice crispy look. This is when they load them into a big trash bag for you to take home. Pro Tip: Bring a cooler for your car and toss the chilies in there to prevent filling the car with the smell of roasted chilies.
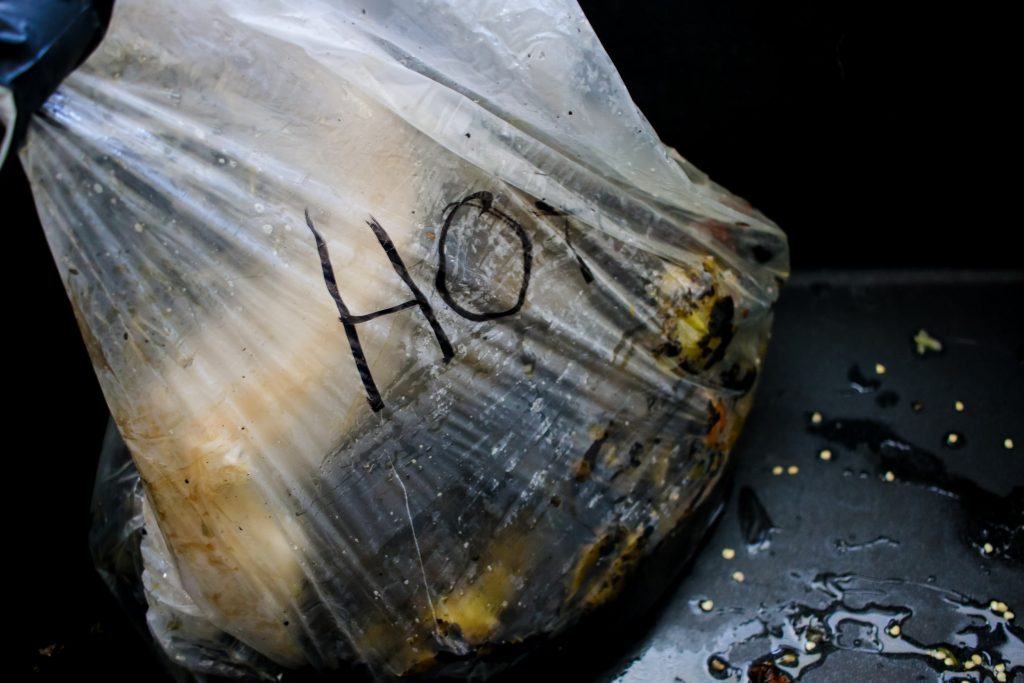
Once home, leave the chilies in the bags overnight to cool. This allows the chiles to ‘sweat’ and will make it easier to remove the skins. The bags will begin to drip so you can either keep them in the cooler or toss them into a sink.
Once you start cleaning you need a large sink, two plastic colanders and a pair of rubber gloves. Chilies are spicy and the capsicum will get into your skin and cuticles. If you don’t use gloves, definitely don’t plan to touch your eyes for a few days!

Turn the sink on low and run the chilies one at a time under the water. The skin will peel off quickly and you can toss it into the first colanders. I then place my clean chilies into the second colander.
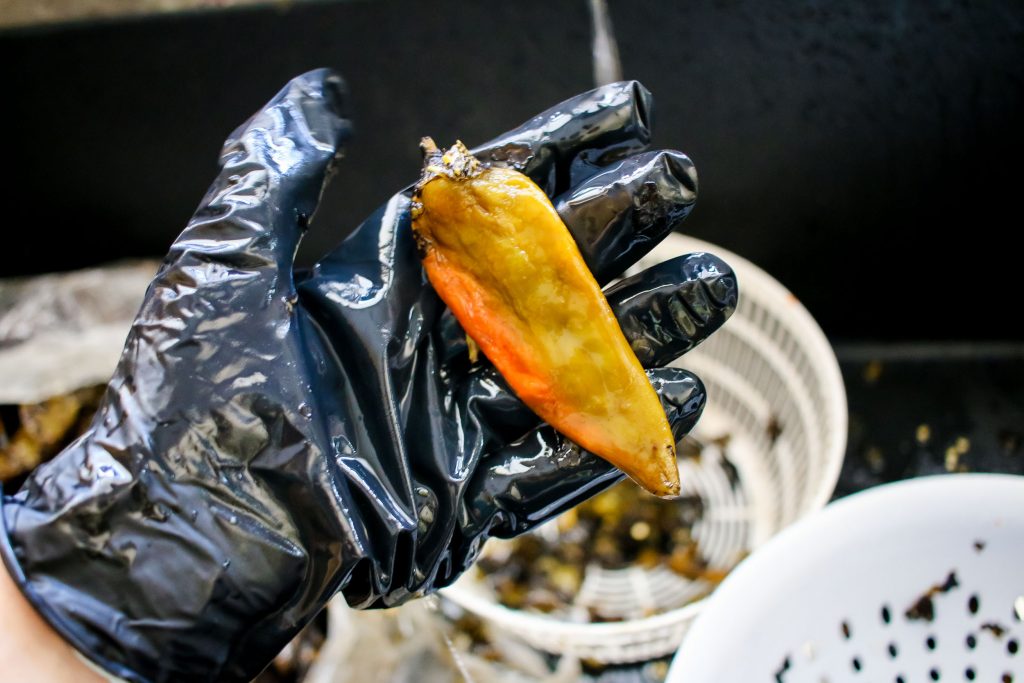
If you like heat, leave the caps and seeds on your chiles. If you do not, remove the tops and wash out as many seeds as you can. The spiciness lies in the chile seeds.
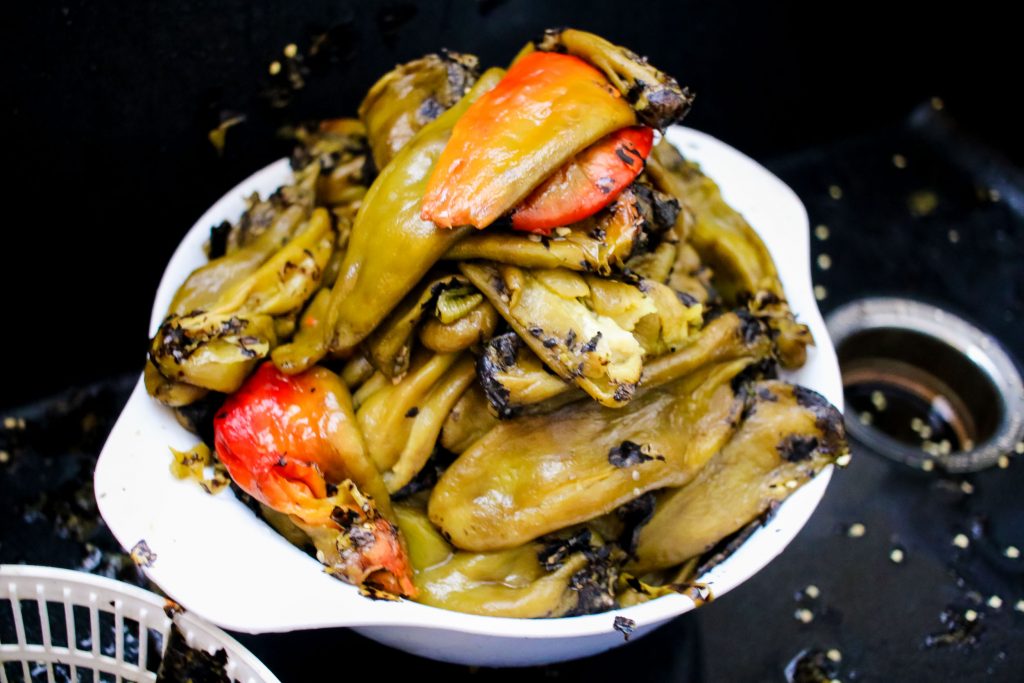
Once you have finished the first cleaning round I like to go through the entire batch a second time as I place them into 1 qt freezer bags. I usually count out 20 chilies per bag.
A single bushel produces about 6-8 1 quart bags depending on the size of the chilies. Once everything is sorted and cleaned, lay them flat in the freezer and the chilies will keep for up to a year!
Frozen green chilies are perfect for making Pork Green Chili, breakfast casseroles, chili relleno and more. Do you have a favorite green chili recipe? Leave it in the comments!

The Instant Pot has been a game changer in my house. With how easy it makes getting dinner on the table I wanted to try out some options for other meals – like breakfast. Recently I’ve been loving the Garden Lites Frittata’s from Costco for a quick and easy breakfast but unfortunately they aren’t an item that is sold year round.
I heard that it’s super easy to make Frittata’s using my instant pot so I set out to find a few recipes. To cook these up easily you need to pick up an egg bites mold and you’ll be on your way to a quick and easy breakfast in minutes (or as soon as Amazon delivers).
Continue Reading…
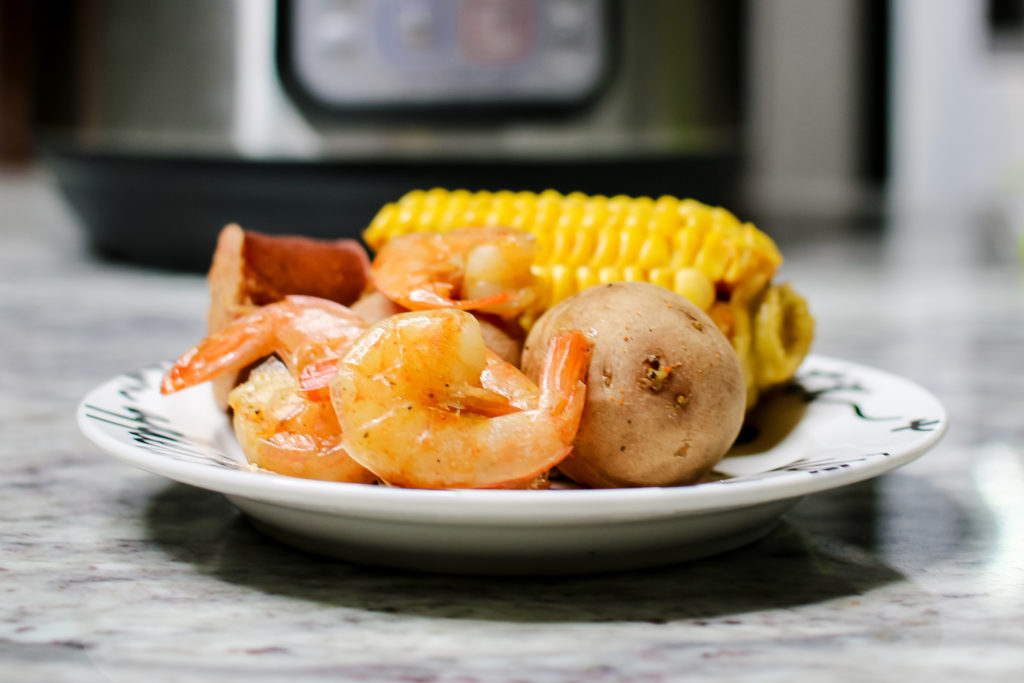
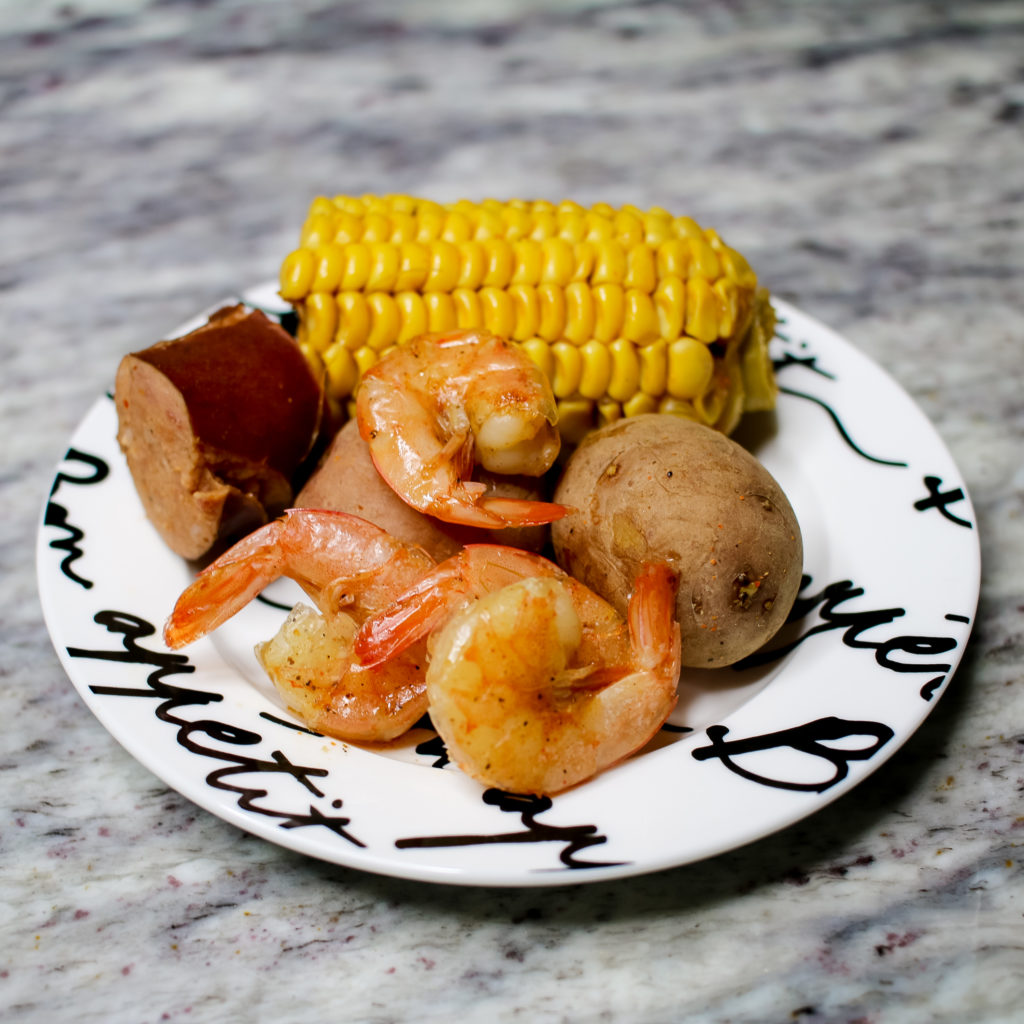
Summer is prime shrimp season and while we live in Colorado far from the ocean it’s still one of my favorite dishes, especially if you can get your hands on a fresh catch. If not frozen still works out pretty good and makes it easy to enjoy a shrimp boil anytime of year.
In the south, shrimp is cooked up outside in a big stock pot over a high heat. It’s not complicated to make but it does make the kitchen pretty hot. Cooking this dish up in the instant pot means you can easily have dinner on the table in minutes, all without adding extra heat into your house. Instant Pot Shrimp is the perfect spin on a classic summer dish and once you’ve tried it you’ll never make it the old way again!
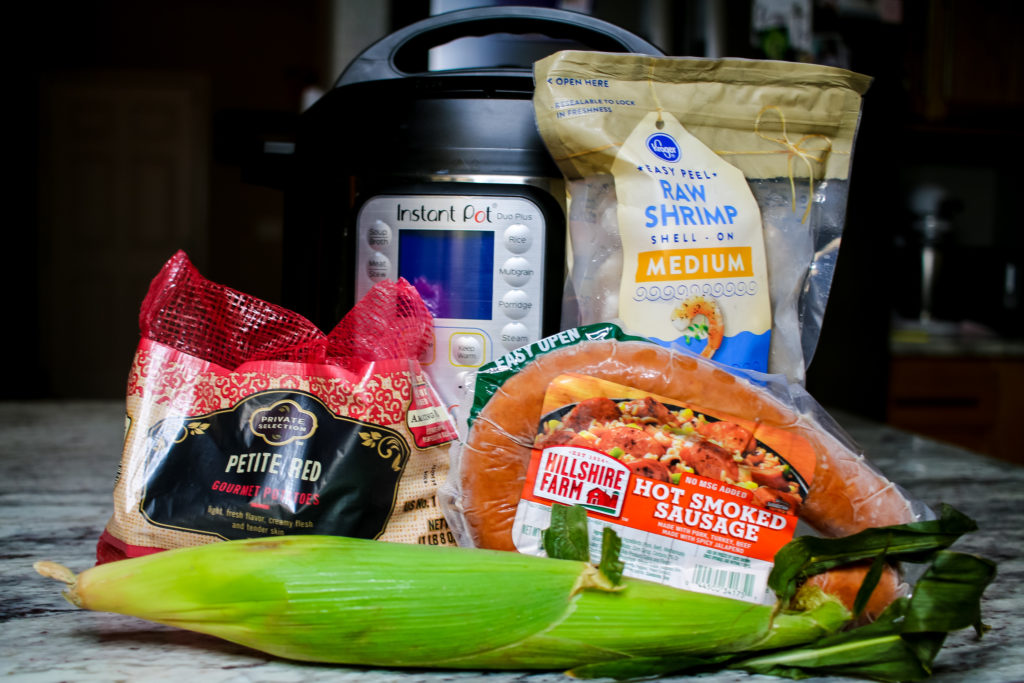
After cleaning the corn place the corn, sausage and potatoes into the instant pot with 4 cups of water. In this instance I used frozen sausage and it came out perfectly but you could use defrosted.
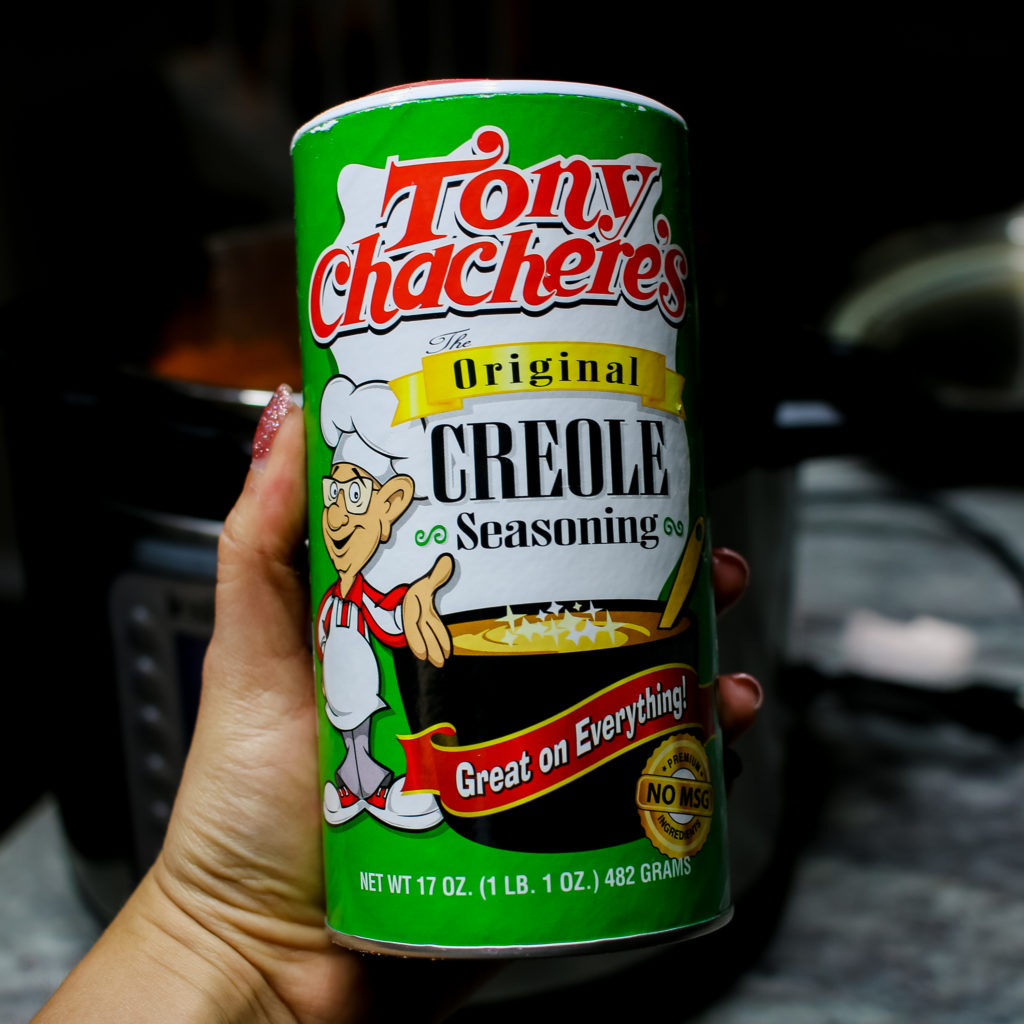

Add in 4 tablespoons creole seasoning. You can use whatever your preferred pre-made brand is. I really like Ton Chacheres but there are tons of different options available.
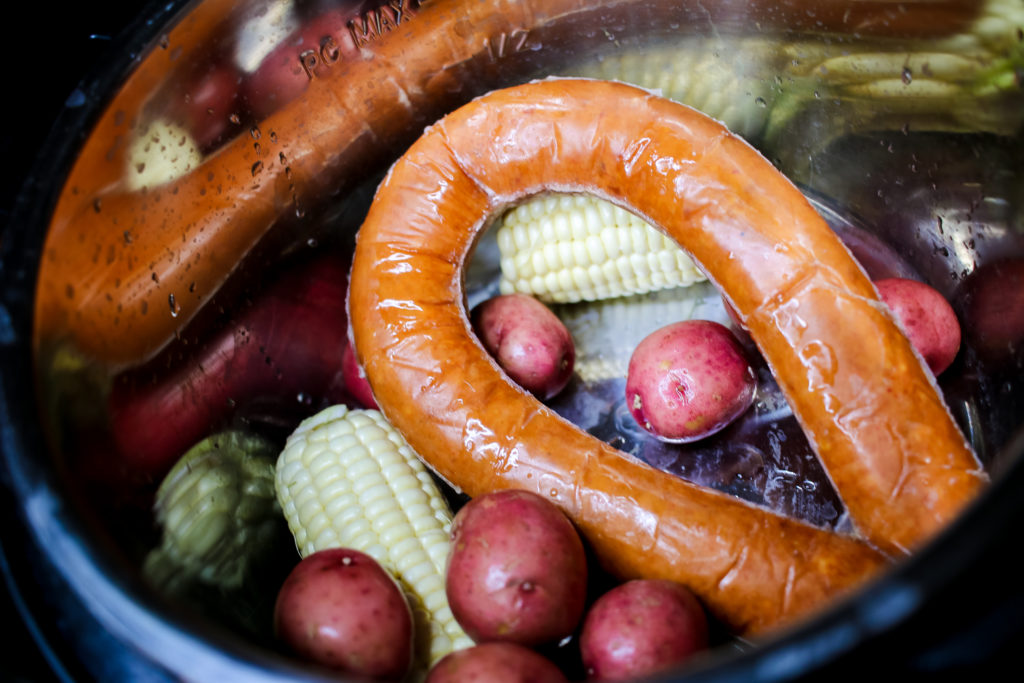
Set the instant pot to high pressure for 3 minutes. If you are using frozen shrimp, defrost under cold water while the rest cooks. Once the pressure cycle completes allow to slow release for 5 minutes and then quick release the rest of the pressure.
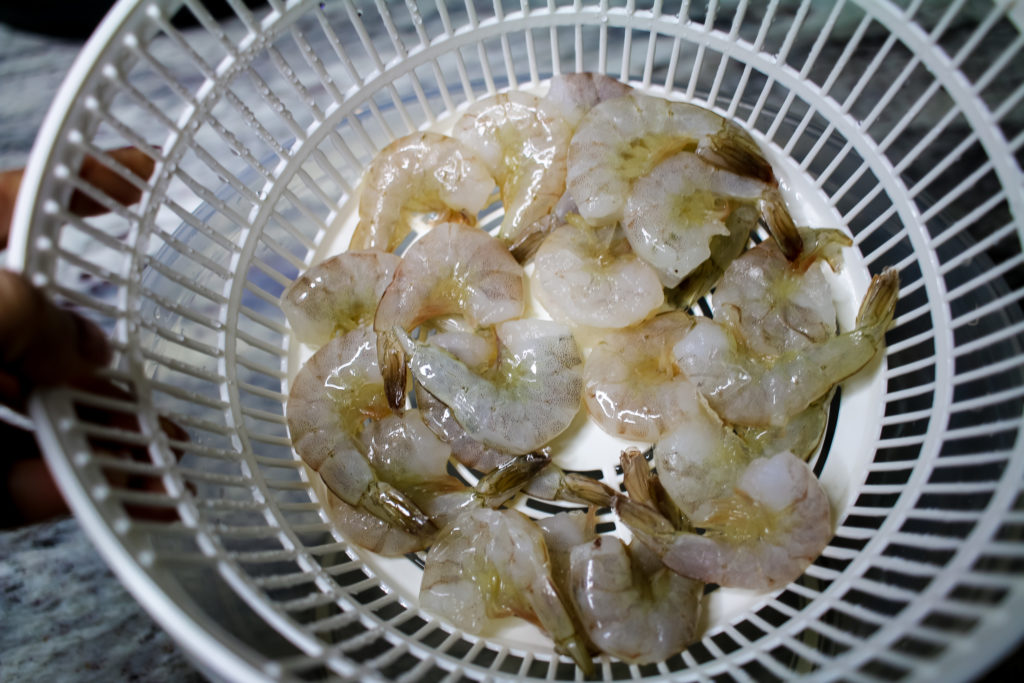
Leave the lid off and set the instant pot to saute. This will bring the pot to a fast boil. If you used frozen sausage retrieve it from the pot and cut into small pieces. Add the shrimp and cook for 4-5 minutes until pink.

Serve with lemon and butter and eat out on the patio!
[sp_recipe]

Interested in other summer recipes for your Instant Pot? Check out my Instant Pot Roast Chicken!

Disclaimer: I received a complimentary set of OXO Prep Peelers to inspire this post.
With summer nearly here I have been craving veggies. I just planted my first raised bed garden and I can’t wait till the produce is ready to harvest. In the meanwhile it’s easy to pick up fresh fruit and vegetables to make veggie centered dishes at home.
One of the biggest challenges using fresh produce is all the effort that goes into preparation. It’s easy to grab pre-made frozen or canned vegetables but neither will have the fresh from the garden taste you get by shopping in the produce section.
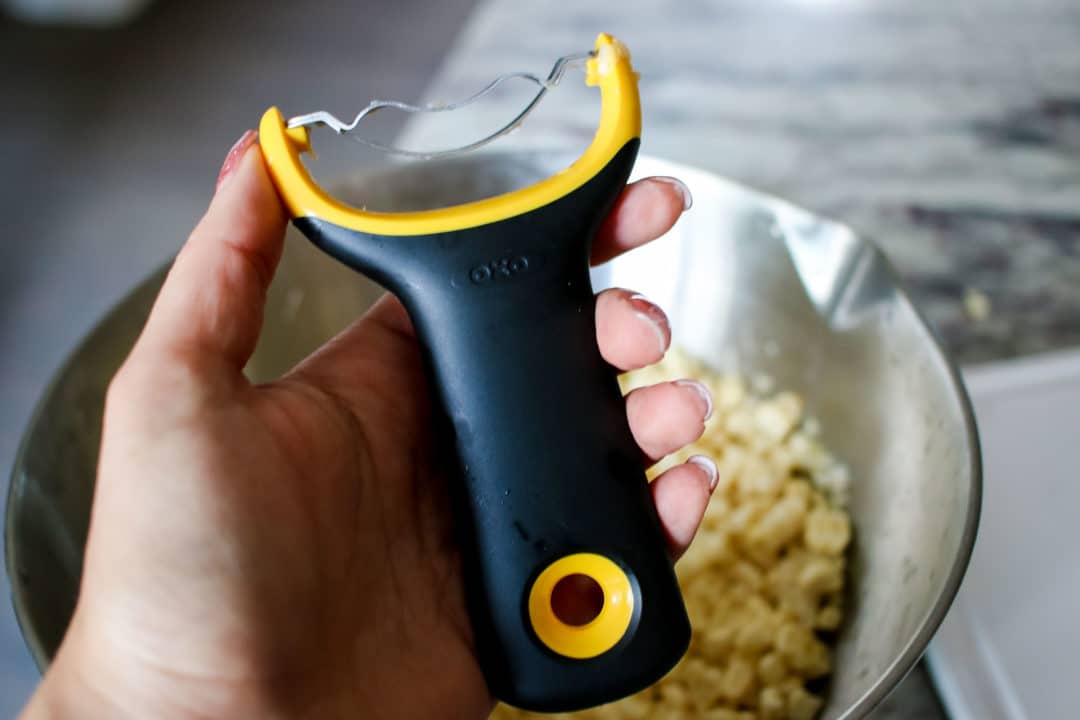
Once you choose to buy fresh, preparing it for your recipes shouldn’t be a burden that leaves you with bags of rotten food wasting away in your refrigerator at the end of the week. This is honestly one of my biggest challenges. As much as I want to cook dishes that are full of fresh vegetables (and shop for doing so) I just don’t have the time. When OXO invited me to try out their new line of Prep Peelers I knew right away I wanted to see how much easier it could be to prep fresh vegetables using these tools.
Designed using stainless steel Japanese blades the entire line is built to last and can even go in the dishwasher for easy cleanup at the end of the night. Compact shapes make holding the peeler easy and keeps finger tips from making it into your dish (because who hasn’t had that happen).
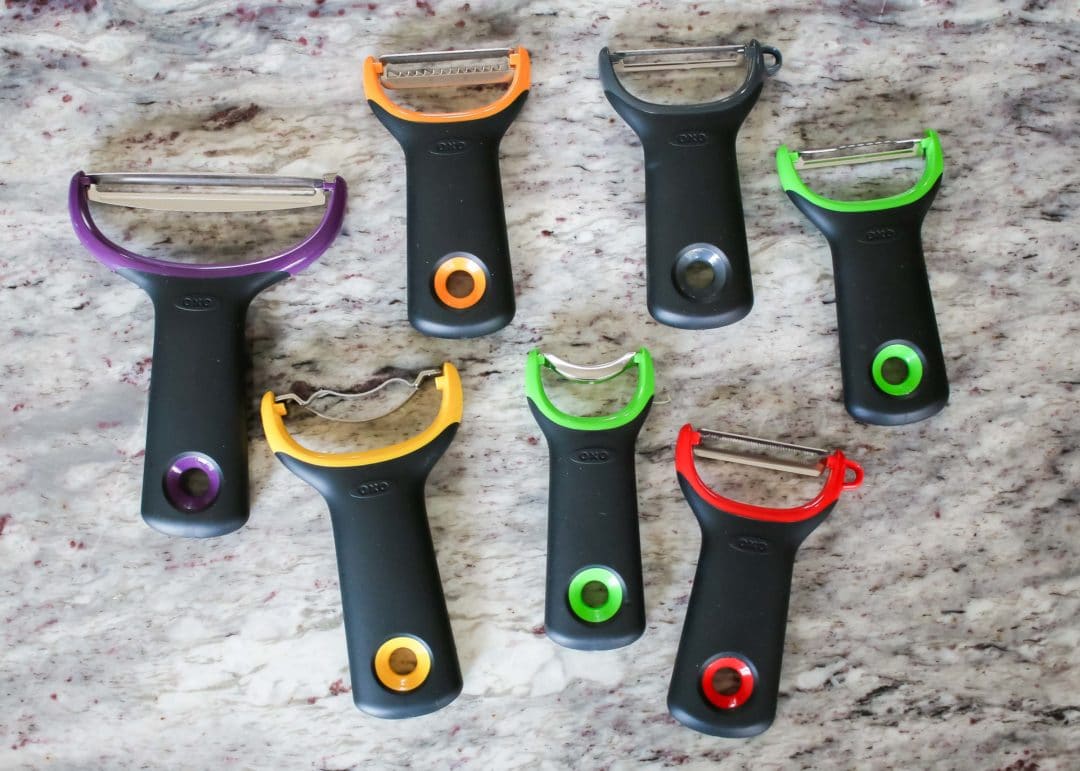
From left to right [clockwise] the peelers you see are:
To try out the new peeler line tested out OXO’s Esquites recipe. You know it’s summer time when the grocery store starts carrying freshly shucked corn and this recipe is the perfect way to enjoy that taste of summer sweetness with your favorite entree.
Esquites is a recipe popularized by street vendors in Mexico. While nothing is quite like what you get off a vendor’s cart this recipe comes close.
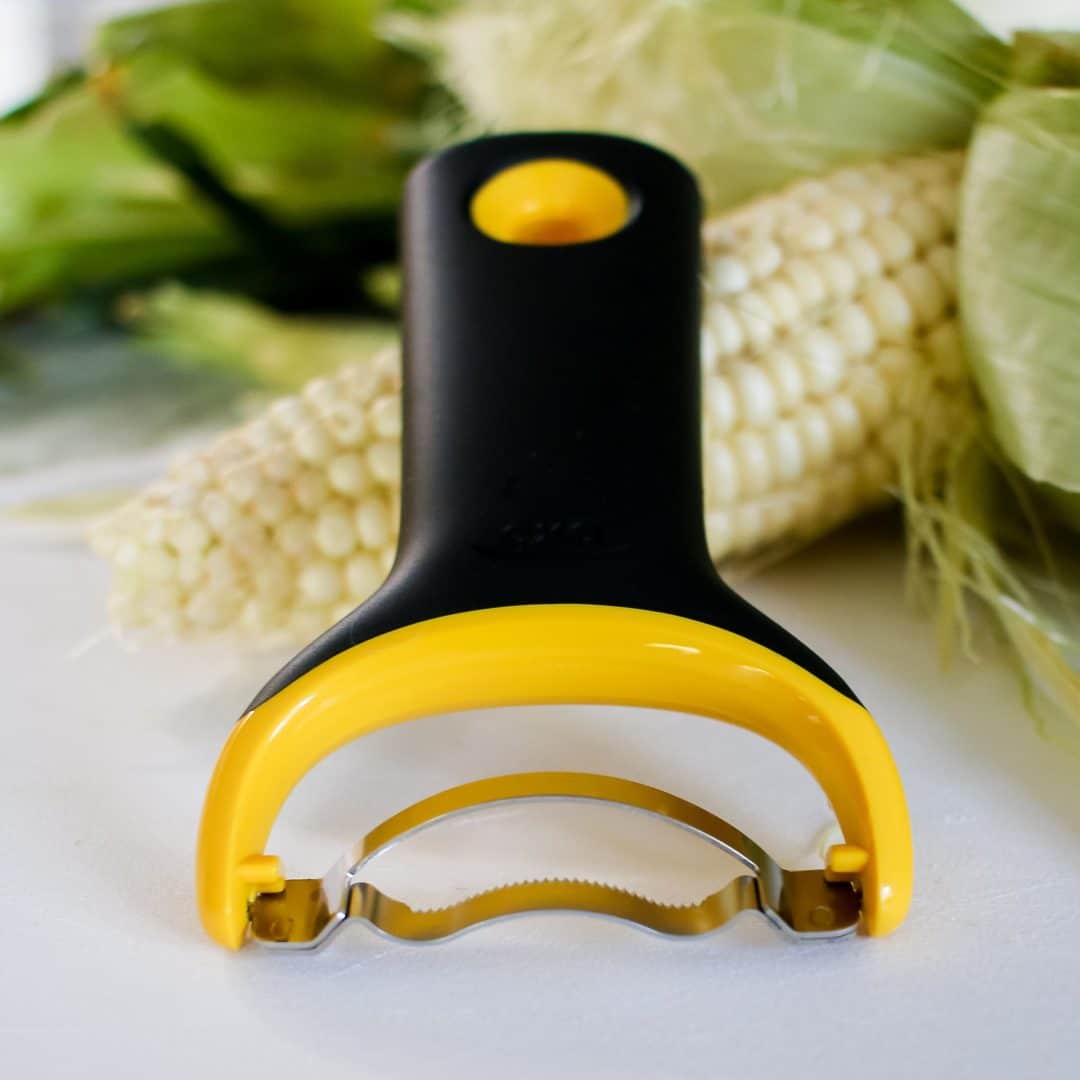
The base of the recipe is fresh corn and the Corn Prep Peeler is the perfect tool for getting all the kernels off your corn.

After roasting the corn in a pan combine with lime, cilantro, jalapeno, mayo and chili power for the perfect summer side dish. You can see the full Esquites recipe over on the OXO Blog.
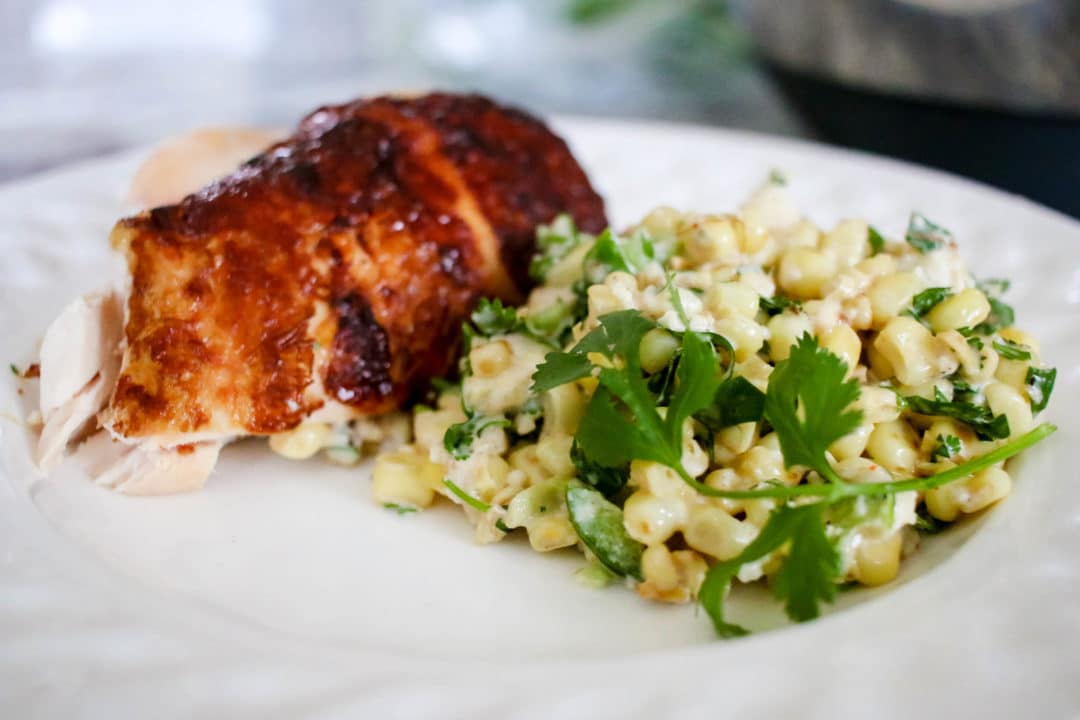
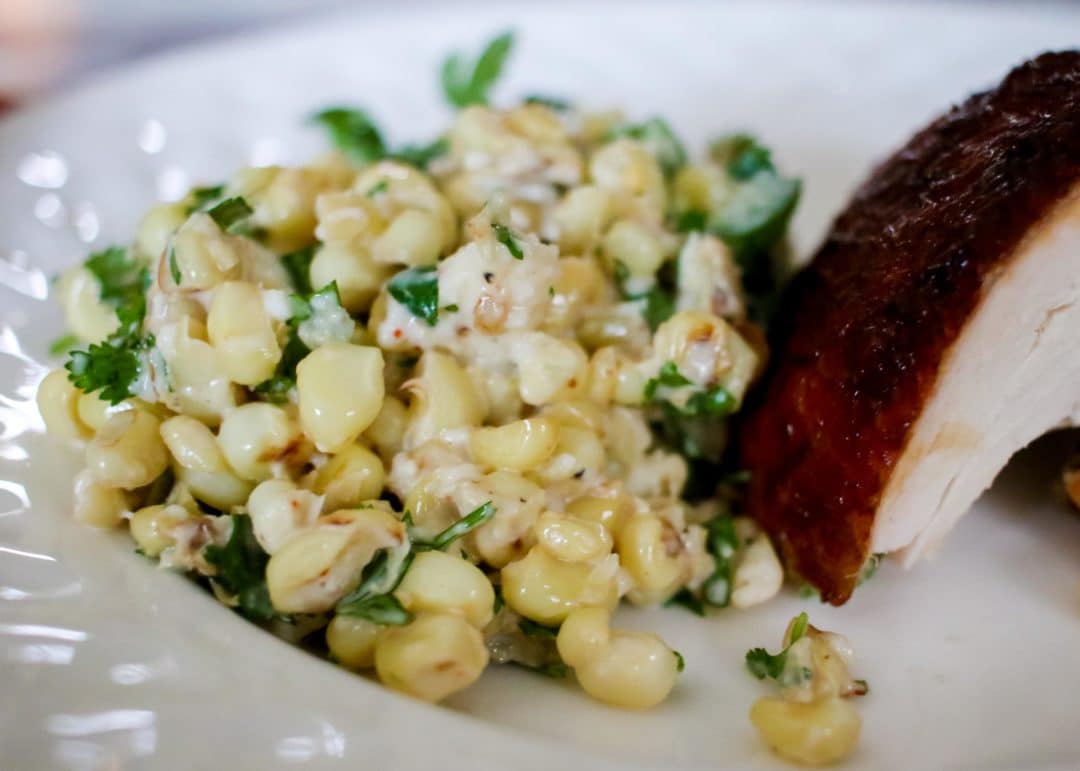
I served my Esquites up alongside rotisserie chicken for a fast and easy meal. I can’t wait to try out the other peelers and see what new and creative ways I can work more vegetables into my meals.
You can check out more recipes using OXO’s new line of Prep Peelers over on the Oxo Blog.