
It’s the perfect time of year to start your herb garden and I can’t wait to put together my own set of Herb Planters using Amanda’s tutorial! See the full project below and be sure to head to the bottom of the post to enter to win a prize from one of our Spring Party sponsors.

Hello! I’m Amanda, and I blog over at The Kolb Corner, where I share all things related to the home from DIY projects and seasonal crafts, to yummy recipes, meal plans and even decorating tips. My husband and I try to stick to a budget when it comes to keeping our home, so everything I make and share focuses on frugality.
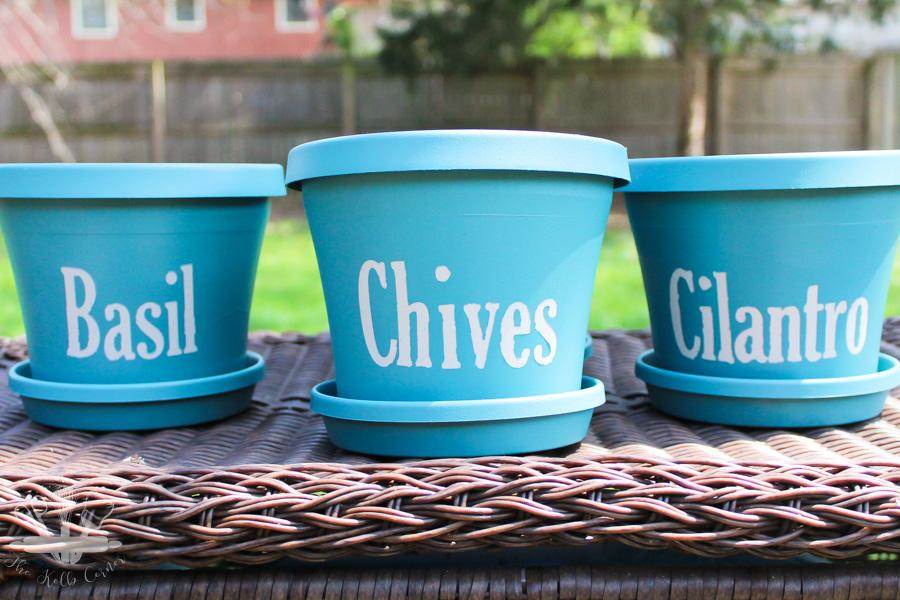
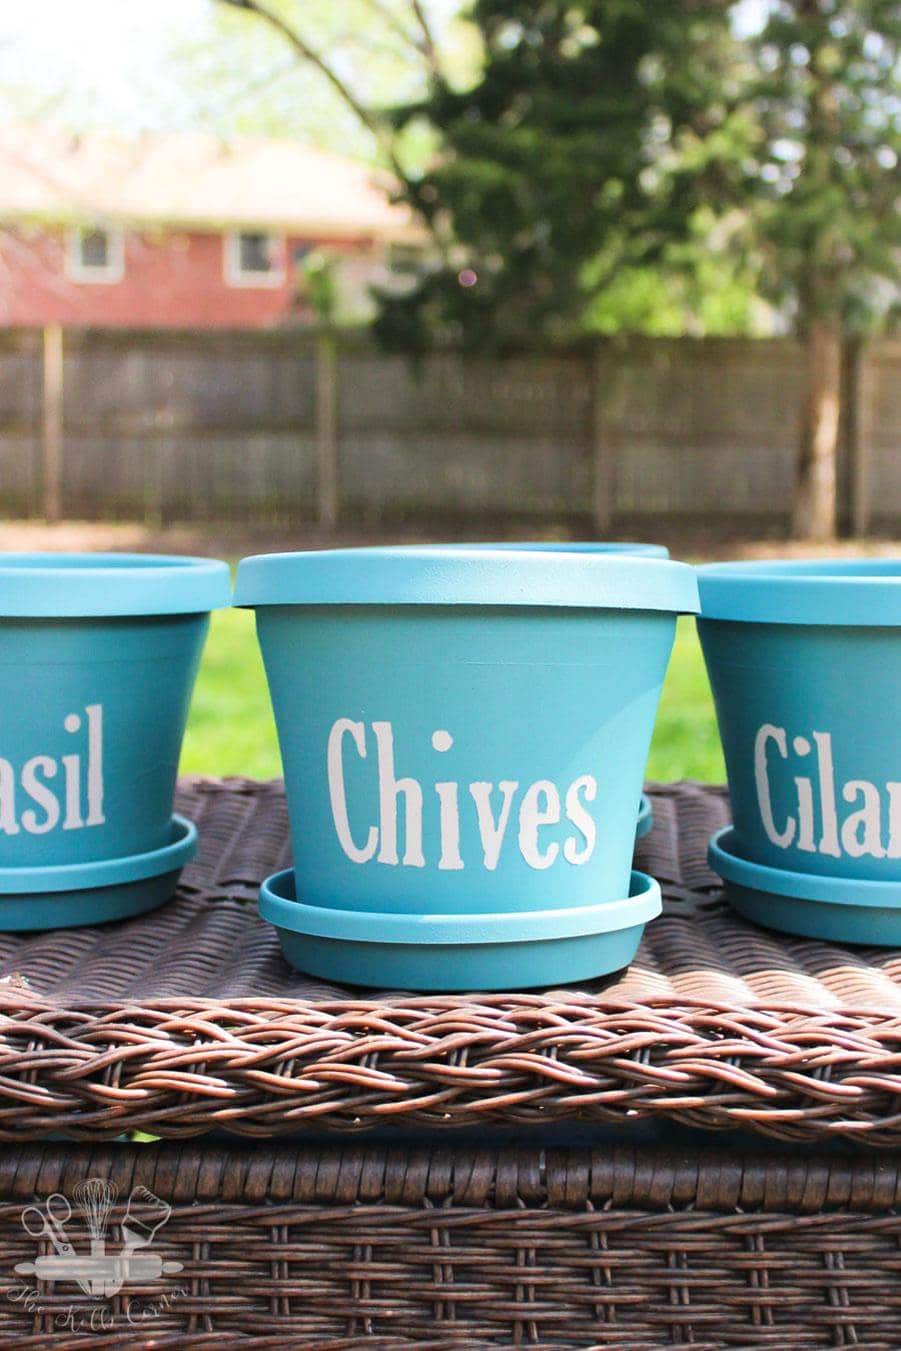
I’m so excited to be participating in this Spring Craft Blog Party! Today I’m showing you how I made these super cute, super easy, easy DIY herb planters for my deck. I love having fresh herbs on hand throughout the Spring and Summer to use in all sorts of recipes. These labeled herb planters are not only cute, but they’re also practical! If you have a hard time keeping track of what plant is what, or losing the little plastic tags that come with your plants, then this project is for you!
Items You’ll Need:
•Plastic pots
•Painter’s tape or transfer tape
•Spray paint in color of choice
•Silhouette Cameo or other cutting machine
•Vinyl (color doesn’t matter)
•Weeding tools
•Herb plants or seeds of choice
** If you don’t have a Silhouette or something similar, you can still do this project using alphabet stickers
First, clean the pots really well to make sure there is no dirt or grime stuck to them.
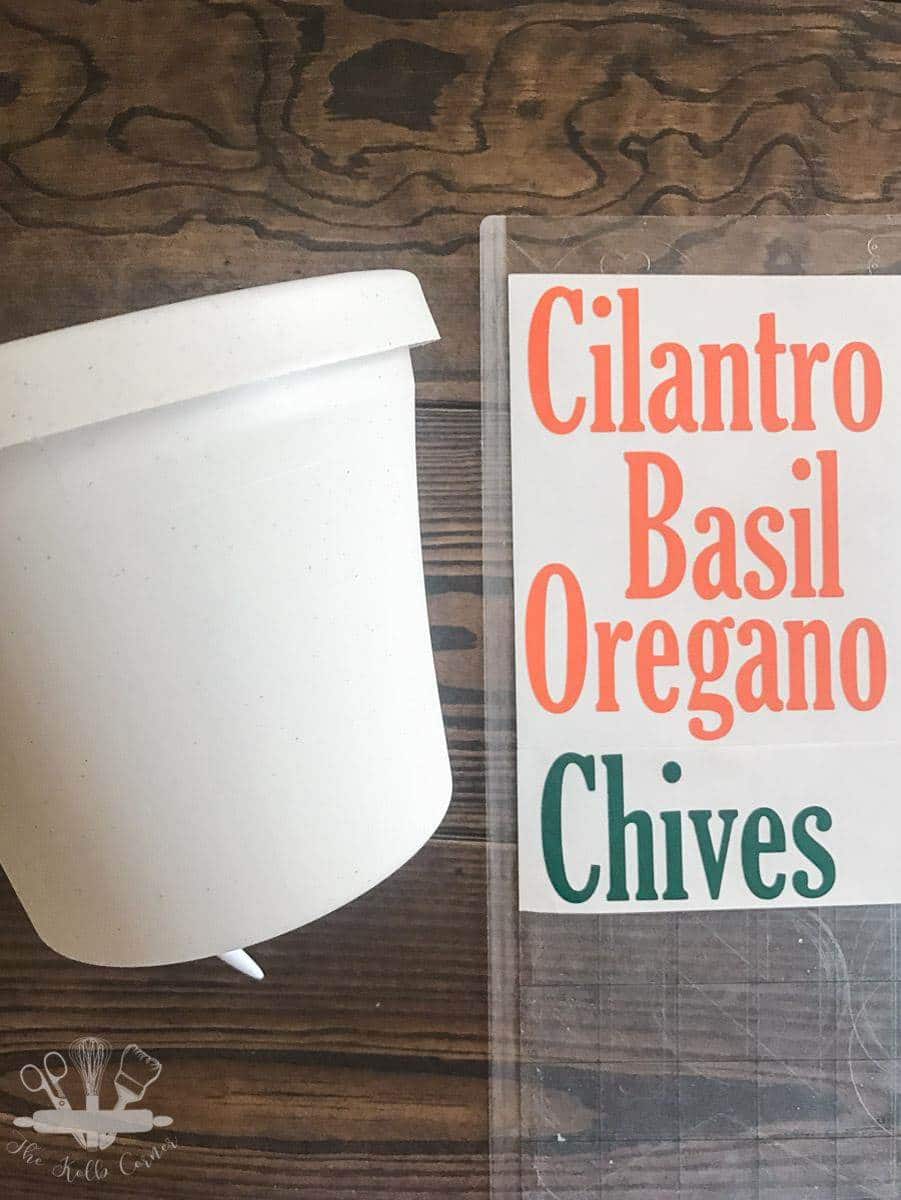
Next, open up Silhouette studio and type the names of the herbs you are planting. I chose herbs that I use a lot of; Oregano, Chives, Cilantro and Basil. Be sure to pick a nice chunky font for this project. If you choose a script or something with thin strokes, it may be hard not to get bleed through, and it will also be harder to pull the vinyl off later on.
Once you have the names and fonts chosen, cut them out onto the vinyl. You could also use contact paper for this, but I felt like the vinyl stuck to the plastic pots better, therefore making bleed through a little less.
When the names are cut, weed out any excess vinyl until you only have the letters left. Using painter’s tape, transfer the vinyl letters over to the plastic pots. You do this by lying a strip of tape over the letters, then carefully peeling the backing away from the vinyl.
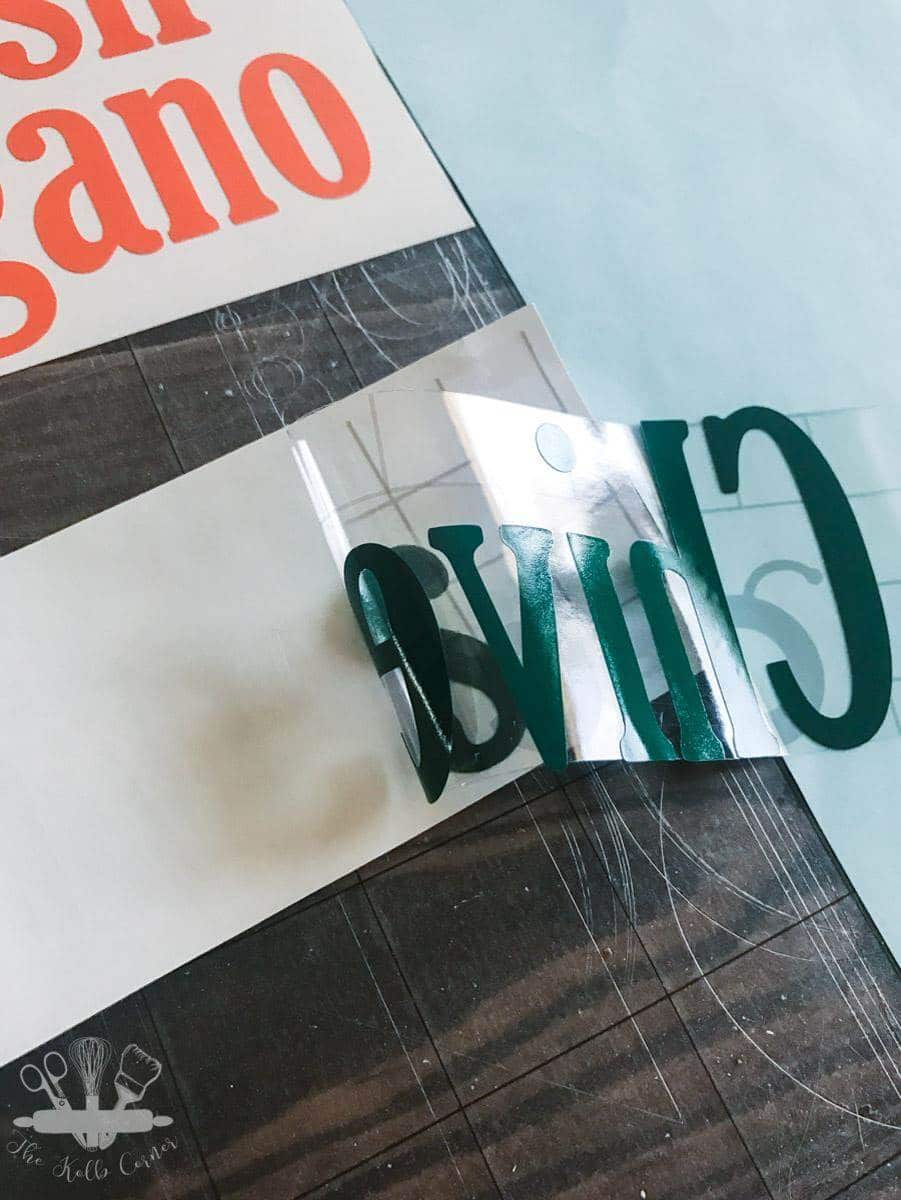
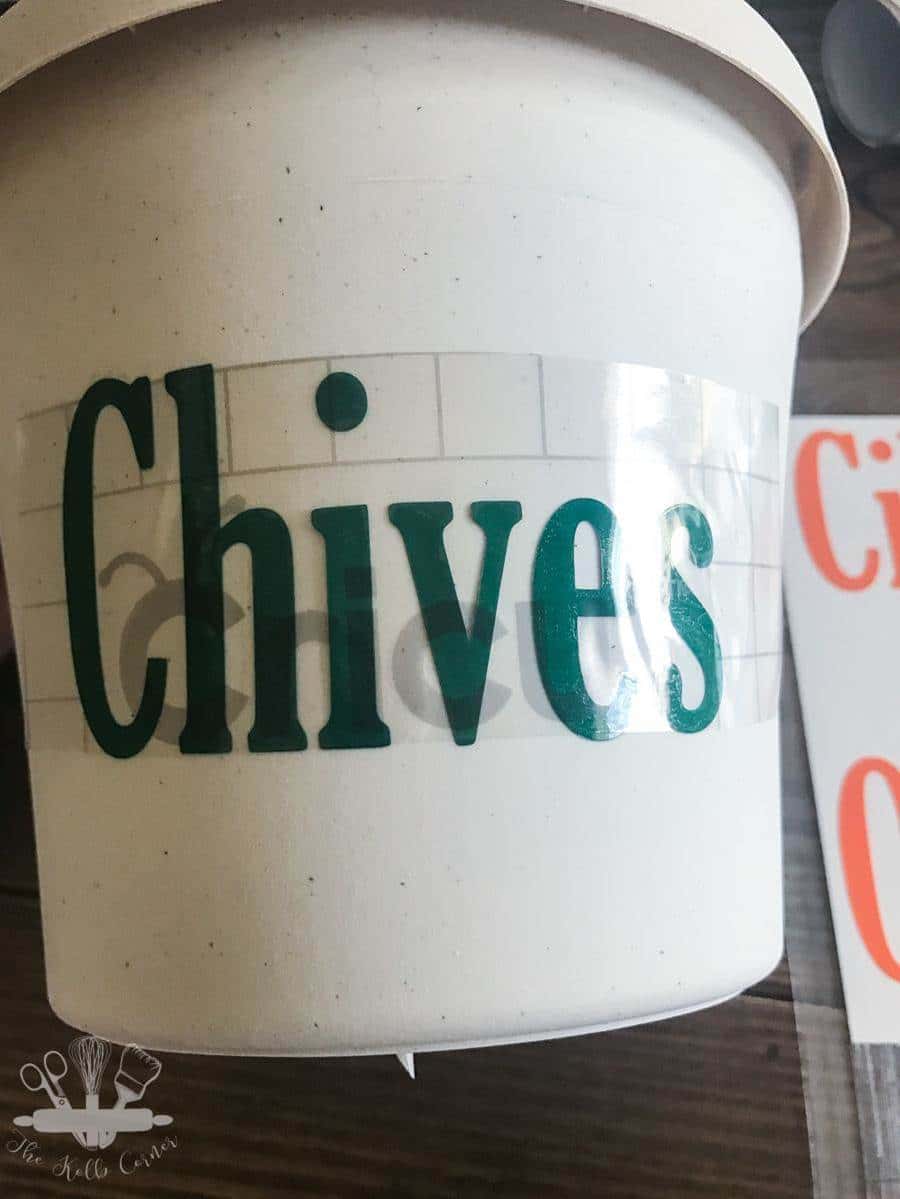
Carefully peel the painters tape away from the letters, leaving them attached to the plastic pot.
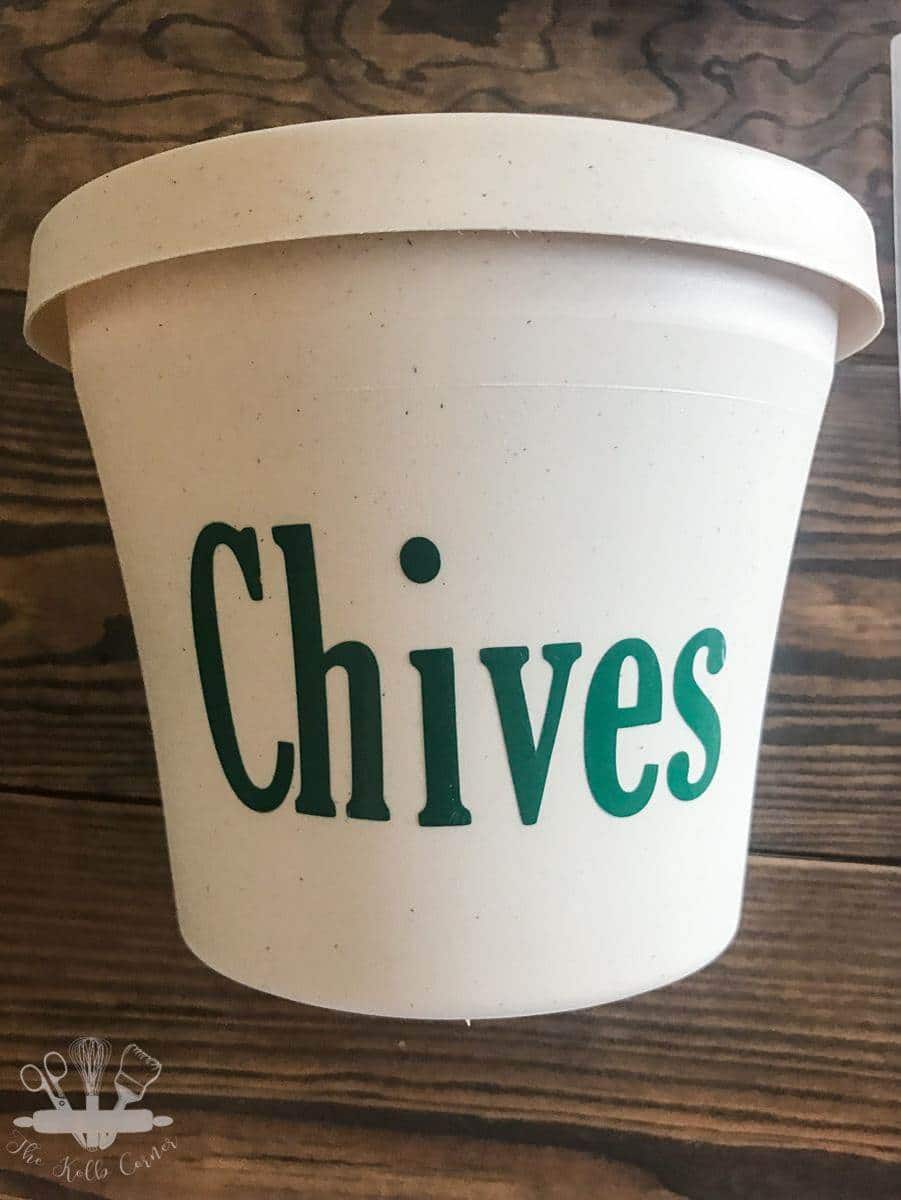
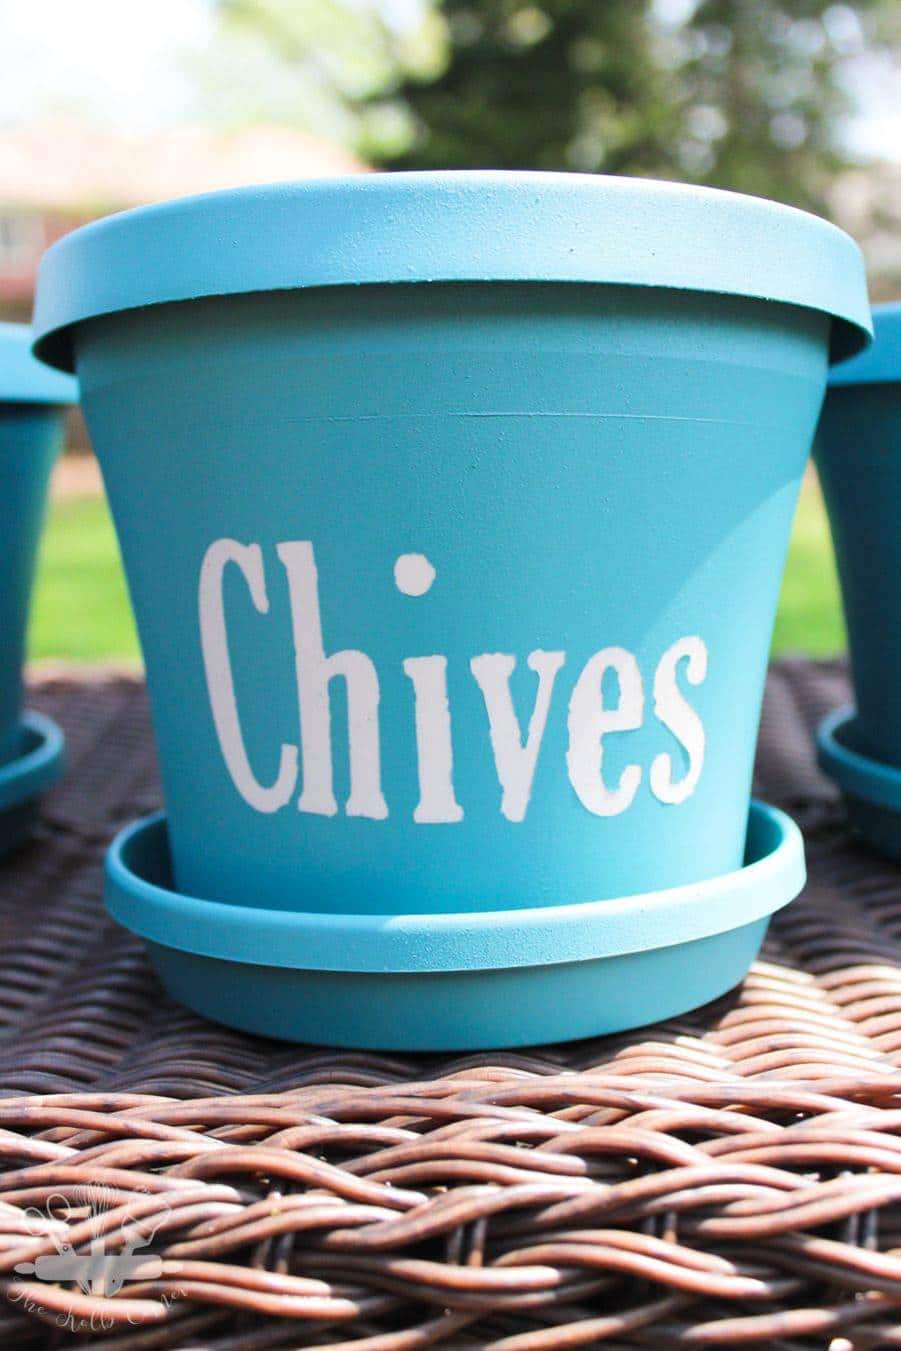
Now you are ready to spray paint! Give the pots a few good coats of paint, letting the coats dry between applications. I love using the Rustoleum 2x Ultra Cover Paint and Primer because it sticks to plastic really well.
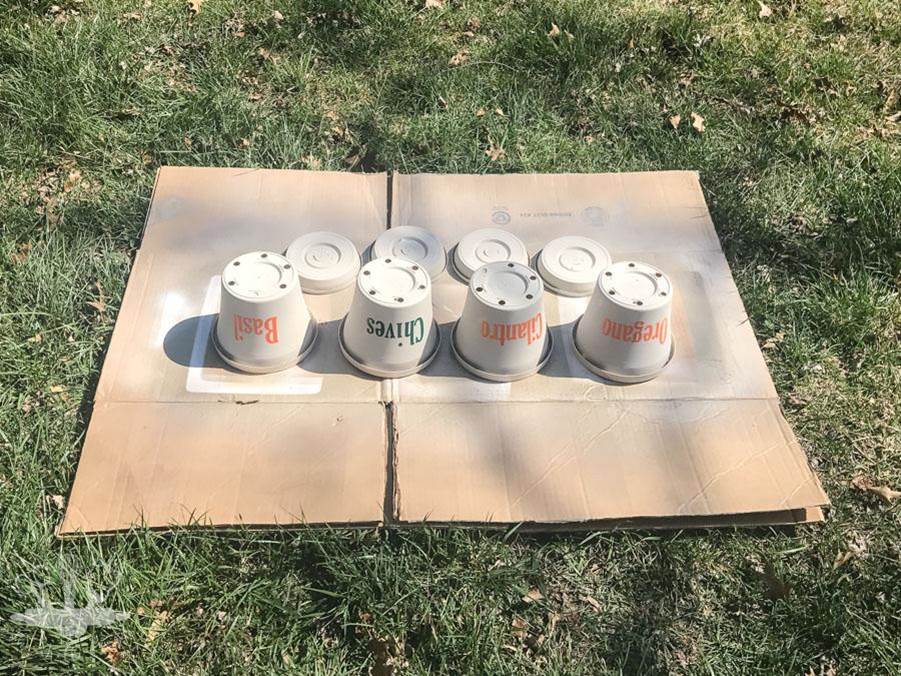
Once the paint is dry and hardened, carefully peel up the vinyl labels. I used my weeding tool for this, but tweezers can also work well.
Plant your herbs as you normally would and stand back to admire your hard work!
I love these easy DIY herb planters, and the same tutorial would work for labeling any type of planter. Or you could put some kind of cheeky saying on them too for a bit of fun! I’m excited to have fresh herbs again, but it seems I’ll have to wait just a bit longer since I chose to grow mine from seed. It has just now warmed up to where I can plant them in my neck of the woods. Luckily I chose varieties that grow quickly!
If you love this project, you can check out my other DIY projects here!

Disclaimer: Contest prizes are provided by sponsors. All writing and opinions belong to myself or the post contributors.