
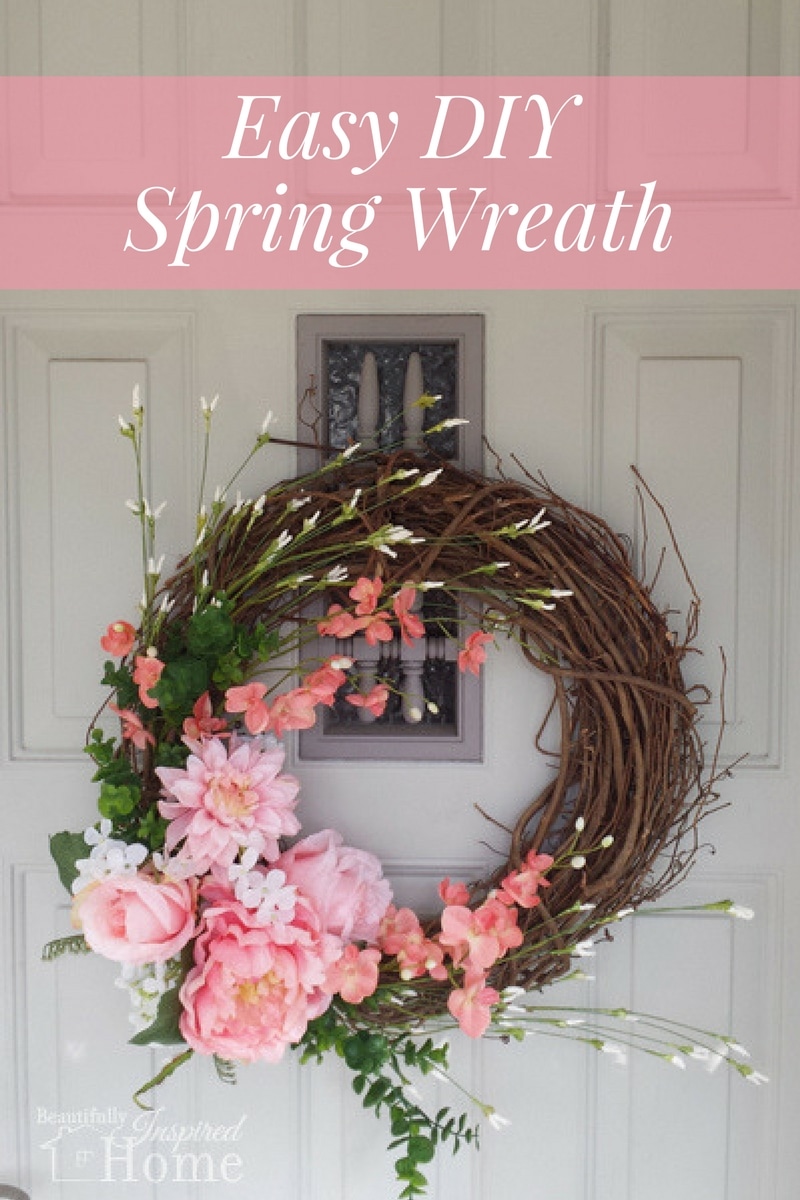
Can you believe we are almost half way through the month? I hope you’ve been inspired by all the fun decor ideas and have been able to add touch of spring to your home before this weekend’s holiday! Today’s beautiful wreath project comes to us from Morgan at Beautifully Inspired Home. Wreaths are one of the easiest ways to change out your decor every season and I love how fresh and bright Morgan’s Spring Wreath is! See the full tutorial below and don’t forget to enter our contest at the end.

Hi, I’m Morgan from Beautifully Inspired Home and I’m so excited to share this spring project with you today! I’m a perpetual crafter and love sharing the tips and tricks I’ve learned. Today we are tackling an easy Spring Wreath for your front door or mantel.

This is a quick and easy spring project to spruce up your front door!
Total Time: 15 minutes
Project Cost $25
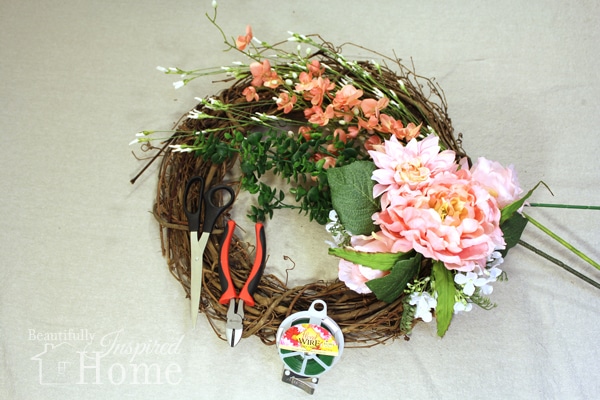
What you’ll need:
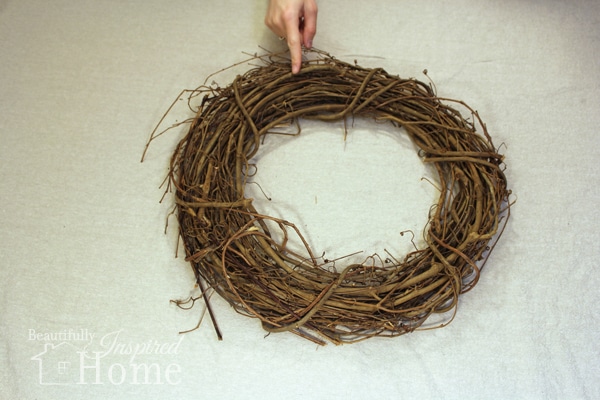
1 Grapevine wreath
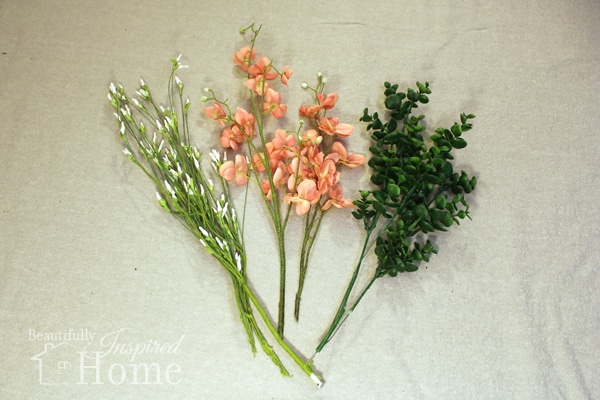
3 Artificial flower stems (1- airy stem, 1 – greenery stem, 1 – Coral/pink flower stem)
1 Pink Nosegay bunch
Floral Wire (optional)
Chenille Stem/Pipe cleaner/Door hanger (optional)
Tools:
Sharp scissors
Wire cutters
First of all you’ll need to separate the branches of your floral stems.This will allow you to achieve more coverage with fewer flowers and to place each stem where you want it.

Depending on your stem use scissors to cut through plastic or paper stems or the wire cutter to cut the wire cores. Leave 6 inches of stem or more if possible. It will be harder to insert the flower stems into the wreath with a stubby end.
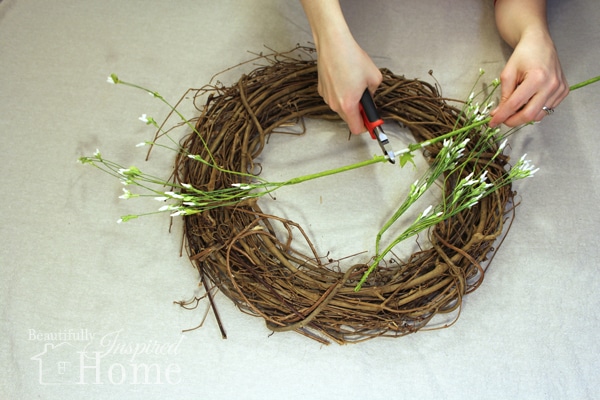
I was able to get 3 pieces off of each stem. These will build the depth and texture of the wreath and make it pop!
Once all the flowers and foliage are prepared you can start assembling the wreath. This will be an asymmetrical design so pick the spot you want to center the focal point. I chose my point on a hole in the grapevine wreath that the nosegay stem would fit snuggly into.
About 4 inches to the side of your focal point, start with your airiest stems and insert them into the wreath. Work the stems into snug spots between the branches of the wreath. If you can get the stems in deep enough you won’t need to use the floral wire to secure it. If you do use wire weave the wire into the wreath and around the flower stems close to your center point. That way the nosegay will hide all the wires when complete. If in doubt hold the nosegay over the wreath to estimate its coverage.
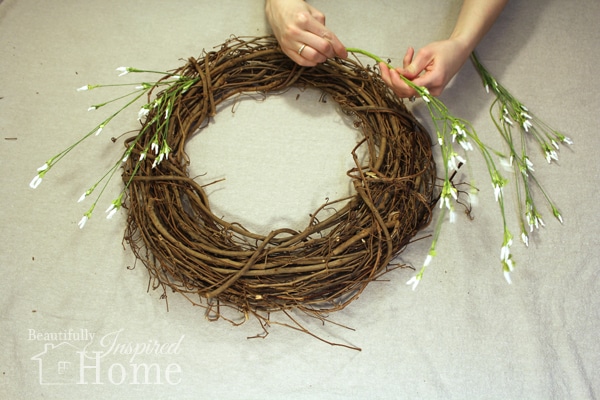
Continue to layer the greenery stems on both sides of the center point. Be sure to angle the stems and fluff the flowers/greenery up and off the wreath form. Most flower arrangements are very airy and this adds volume to the wreath. You don’t want a flat wreath.

I saved the flower accents for on top so they are most pronounced and will make a beautiful transition from the nosegay flowers to the background greenery. As you add stems, don’t be afraid to bend them so they curve around the wreath.
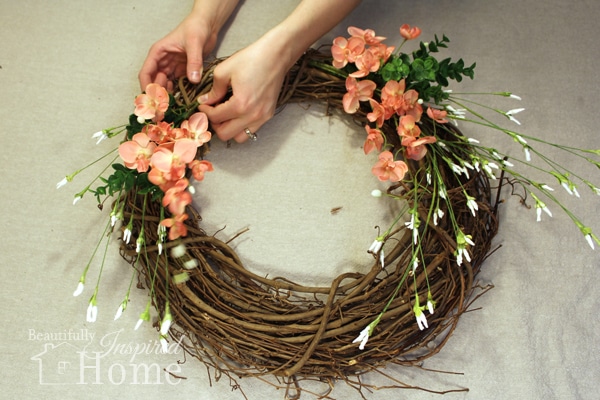
Now add the nosegay. It will hide all the mechanics of the wreath assembly. Not only are nosegays a cost efficient way to purchase a variety of flowers, they are already assembled! I slightly bent the stem of the nosegay. The rounded stem will fit more easily into the wreath branches. Find the gap in the wreath center and gently work the stem deep into the frame. Secure with floral wire if necessary.

Once the nosegay is secure in the wreath bend and fluff the flowers to cover the base of the stems inserted into the wreath. Pull the flowers upward and leave space between them for the most volume.
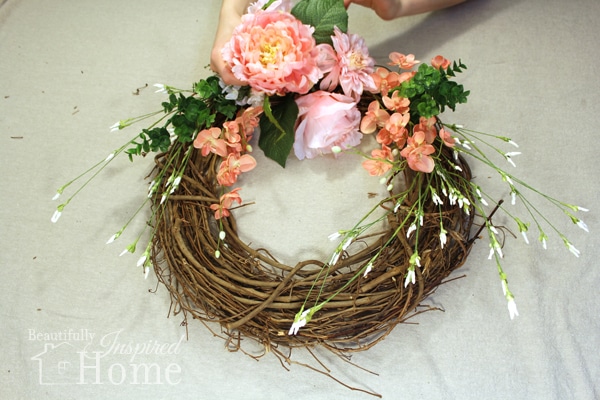
Tweak the flowers and stems until you are happy with the look. To hang your wreath, make a loop of floral wire or use a chenille stem 1/3 from your center point. This will give you the beautiful asymmetrical look. Attach it to a few sturdy branches and hang on your door!

In 15 minutes your home will be ready to welcome guests with the hope and beauty of spring.
Find more home decorating and DIY projects at BeautifullyInspiredHome!
[…] Easy DIY Spring Wreath by Rocky Mountain Bliss […]


1 Comment